Welcome to the PC showcase
This page is tribute to the computers I’ve built and what I learned while doing it. Each one has its own backstory and either helped me learn a new skill or refine an existing one. PC building can be costly but is very rewarding. For those who love tech, getting to put your hands on the hardware and fit it all together is something you should experience at least once.
NZXT Meshify C

The Meshify C was my first build. At the time, 1080p was the sweet spot and fit within my budget. I spent hours on YouTube watching content creators review GPUs, cases, CPUs and coolers so that I could figure out a parts list to shop for. I had 3 different lists active on PCPartPicker. I surfed classifieds like Marketplace, Kijiji and Reddit almost every day for deals. It was endless work but I was determined to make it work.
After weeks (or maybe a month or two) I had collected everything I needed. It went together like clockwork, better than I imagined it. It even posted on the first try. I fired up one of my all time favorites, Battlefield 1, to experience AAA gaming for the first time on PC. There was nothing like it, an immersive experience I’d never had before, playing games with over 100 FPS. It was well worth the wait.
Part List
- Case: Fractal Design Meshify-C ATX Mid Tower
- CPU: Ryzen 5 1600
- GPU: EVGA GTX 1070 FTW 8GB
- Motherboard: Asus ROG Strix B350-F Gaming
- Cooler: Cryorig H7
- Memory: Kingston HyperX Fury 16GB (later bought another 16GB kit off FBM)
- Storage: Corsair Force MP500 120GB M.2, WD Caviar Blue 1TB HD
- Power: SeaSonic M12II Evo 520W 80+ Bronze Full Modular
- Other: Be-Quiet! Pure Wings 2 140mm Fans, NZXT AER RGB Kit, Asus 802.11 Wifi Card, Phanteks 6 fan hub
Ghost S1 (air cooled)


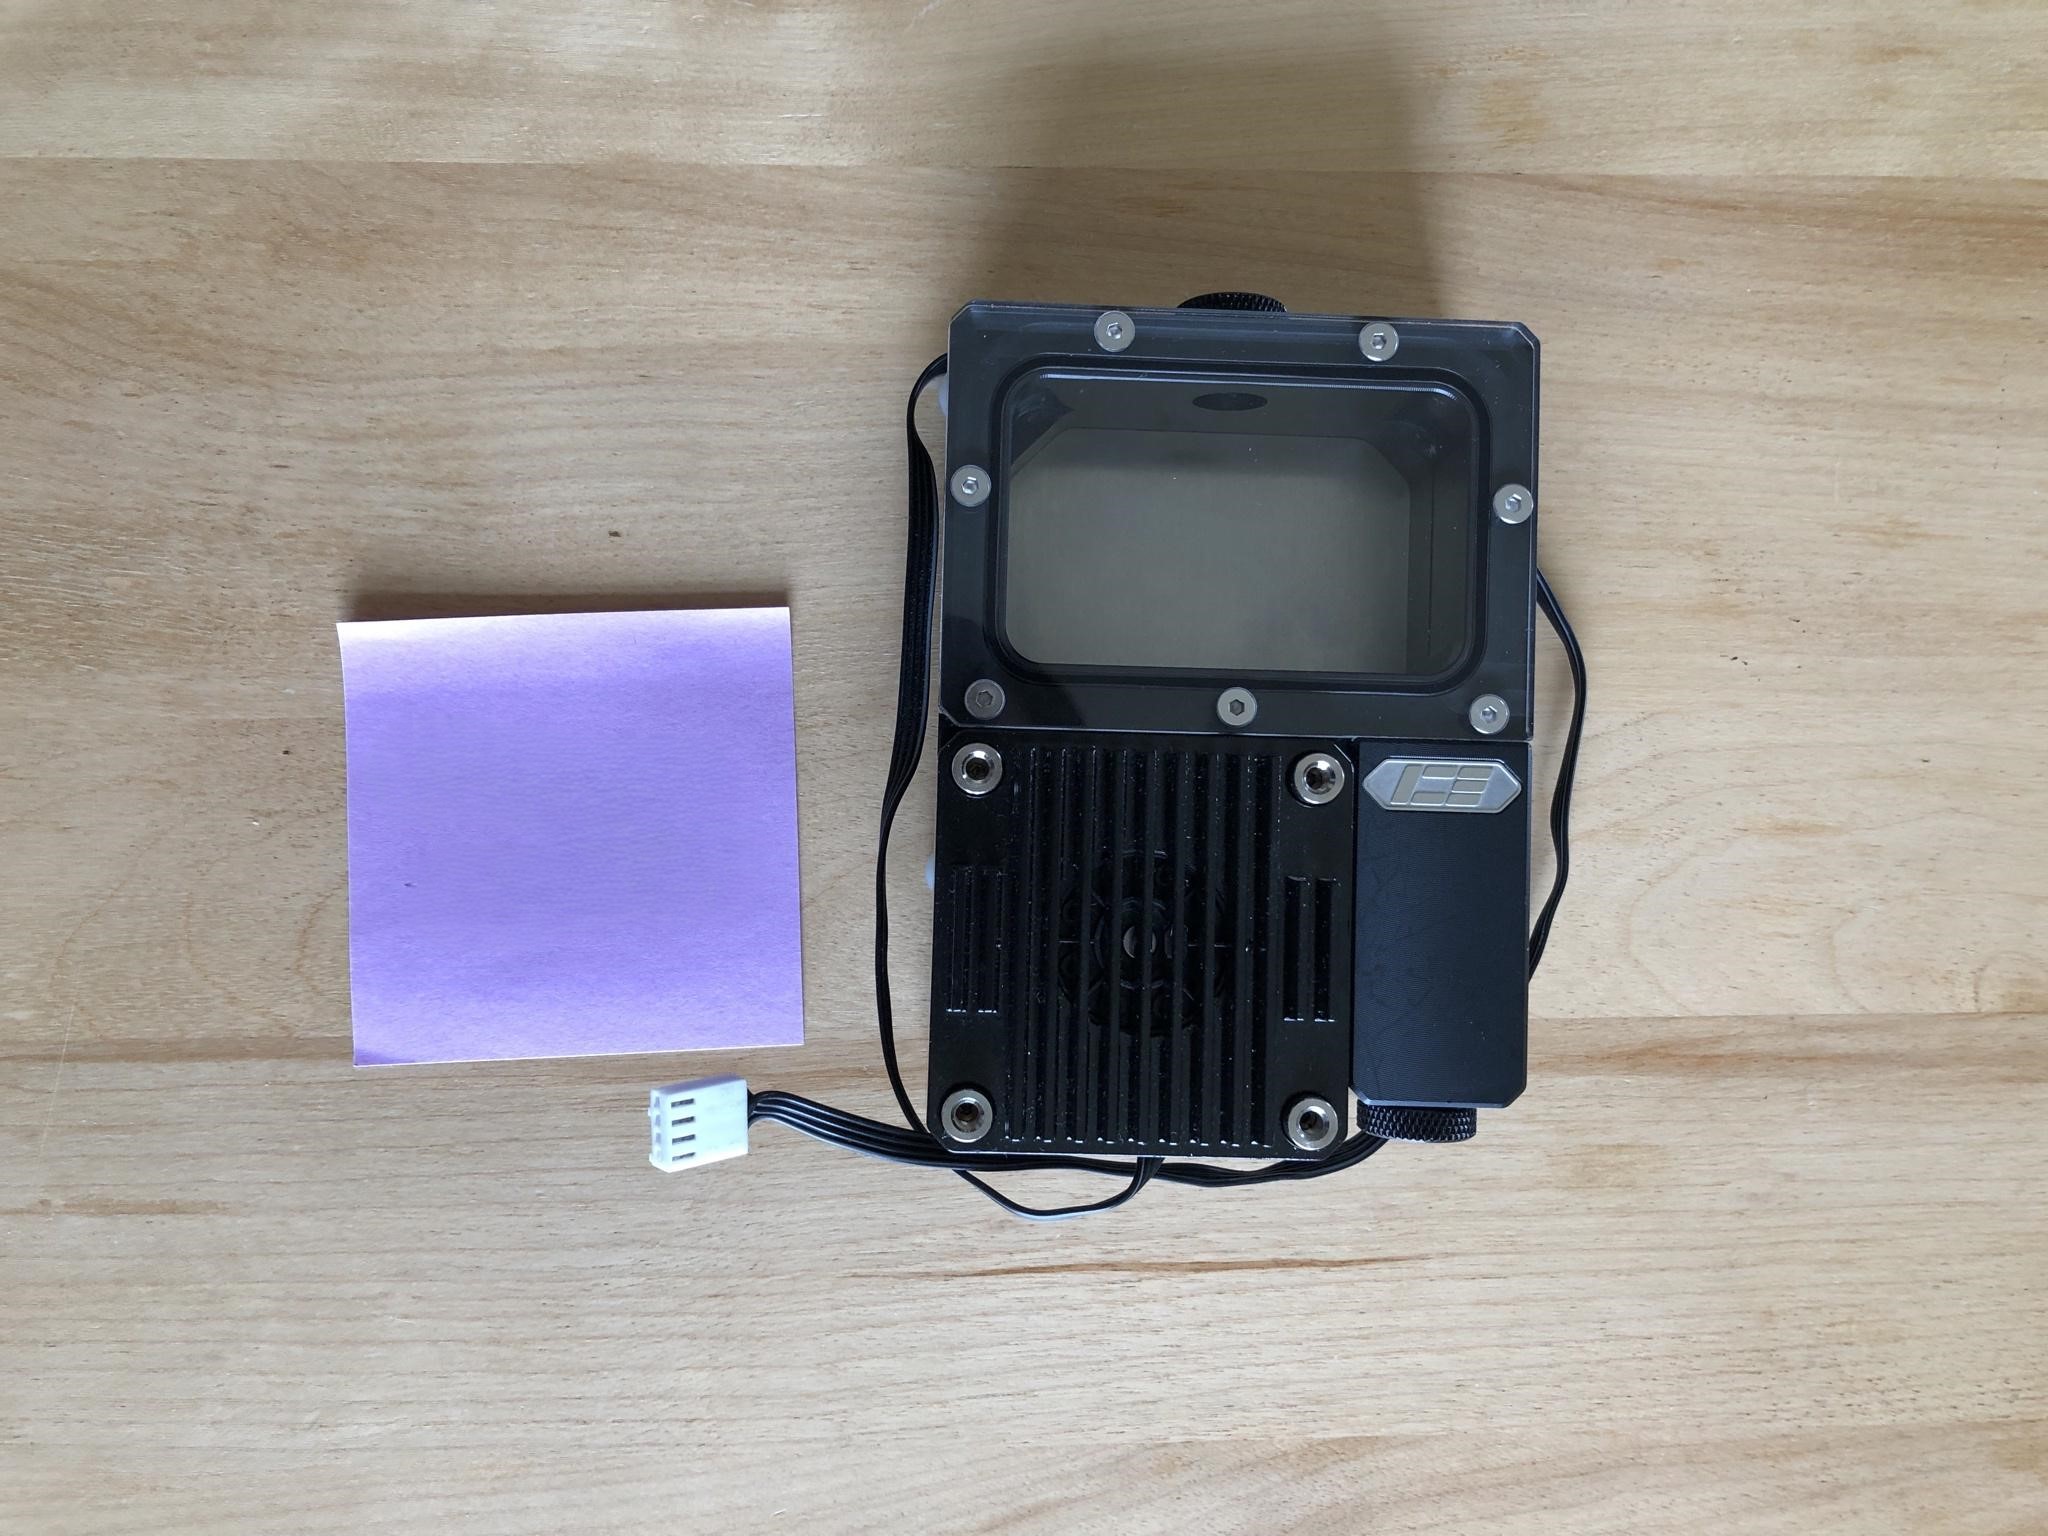
When the Louqe Ghost S1 came out people started making posts about it on r/sffpc and SFF Network. Designed in Stockholm, Sweden, it was known to be one of the most high-end SFF cases on the market with its milled aluminum body and premium anodized finish. I was obsessed with the design and determined to build one. What started out as a typical build evolved into countless hours mulling over the finest of details. I learned how to do custom cabling, optimized air flow and even some heat dissipation basics. It all culminated into my own build signature that was just a little different from all the other ghosts.
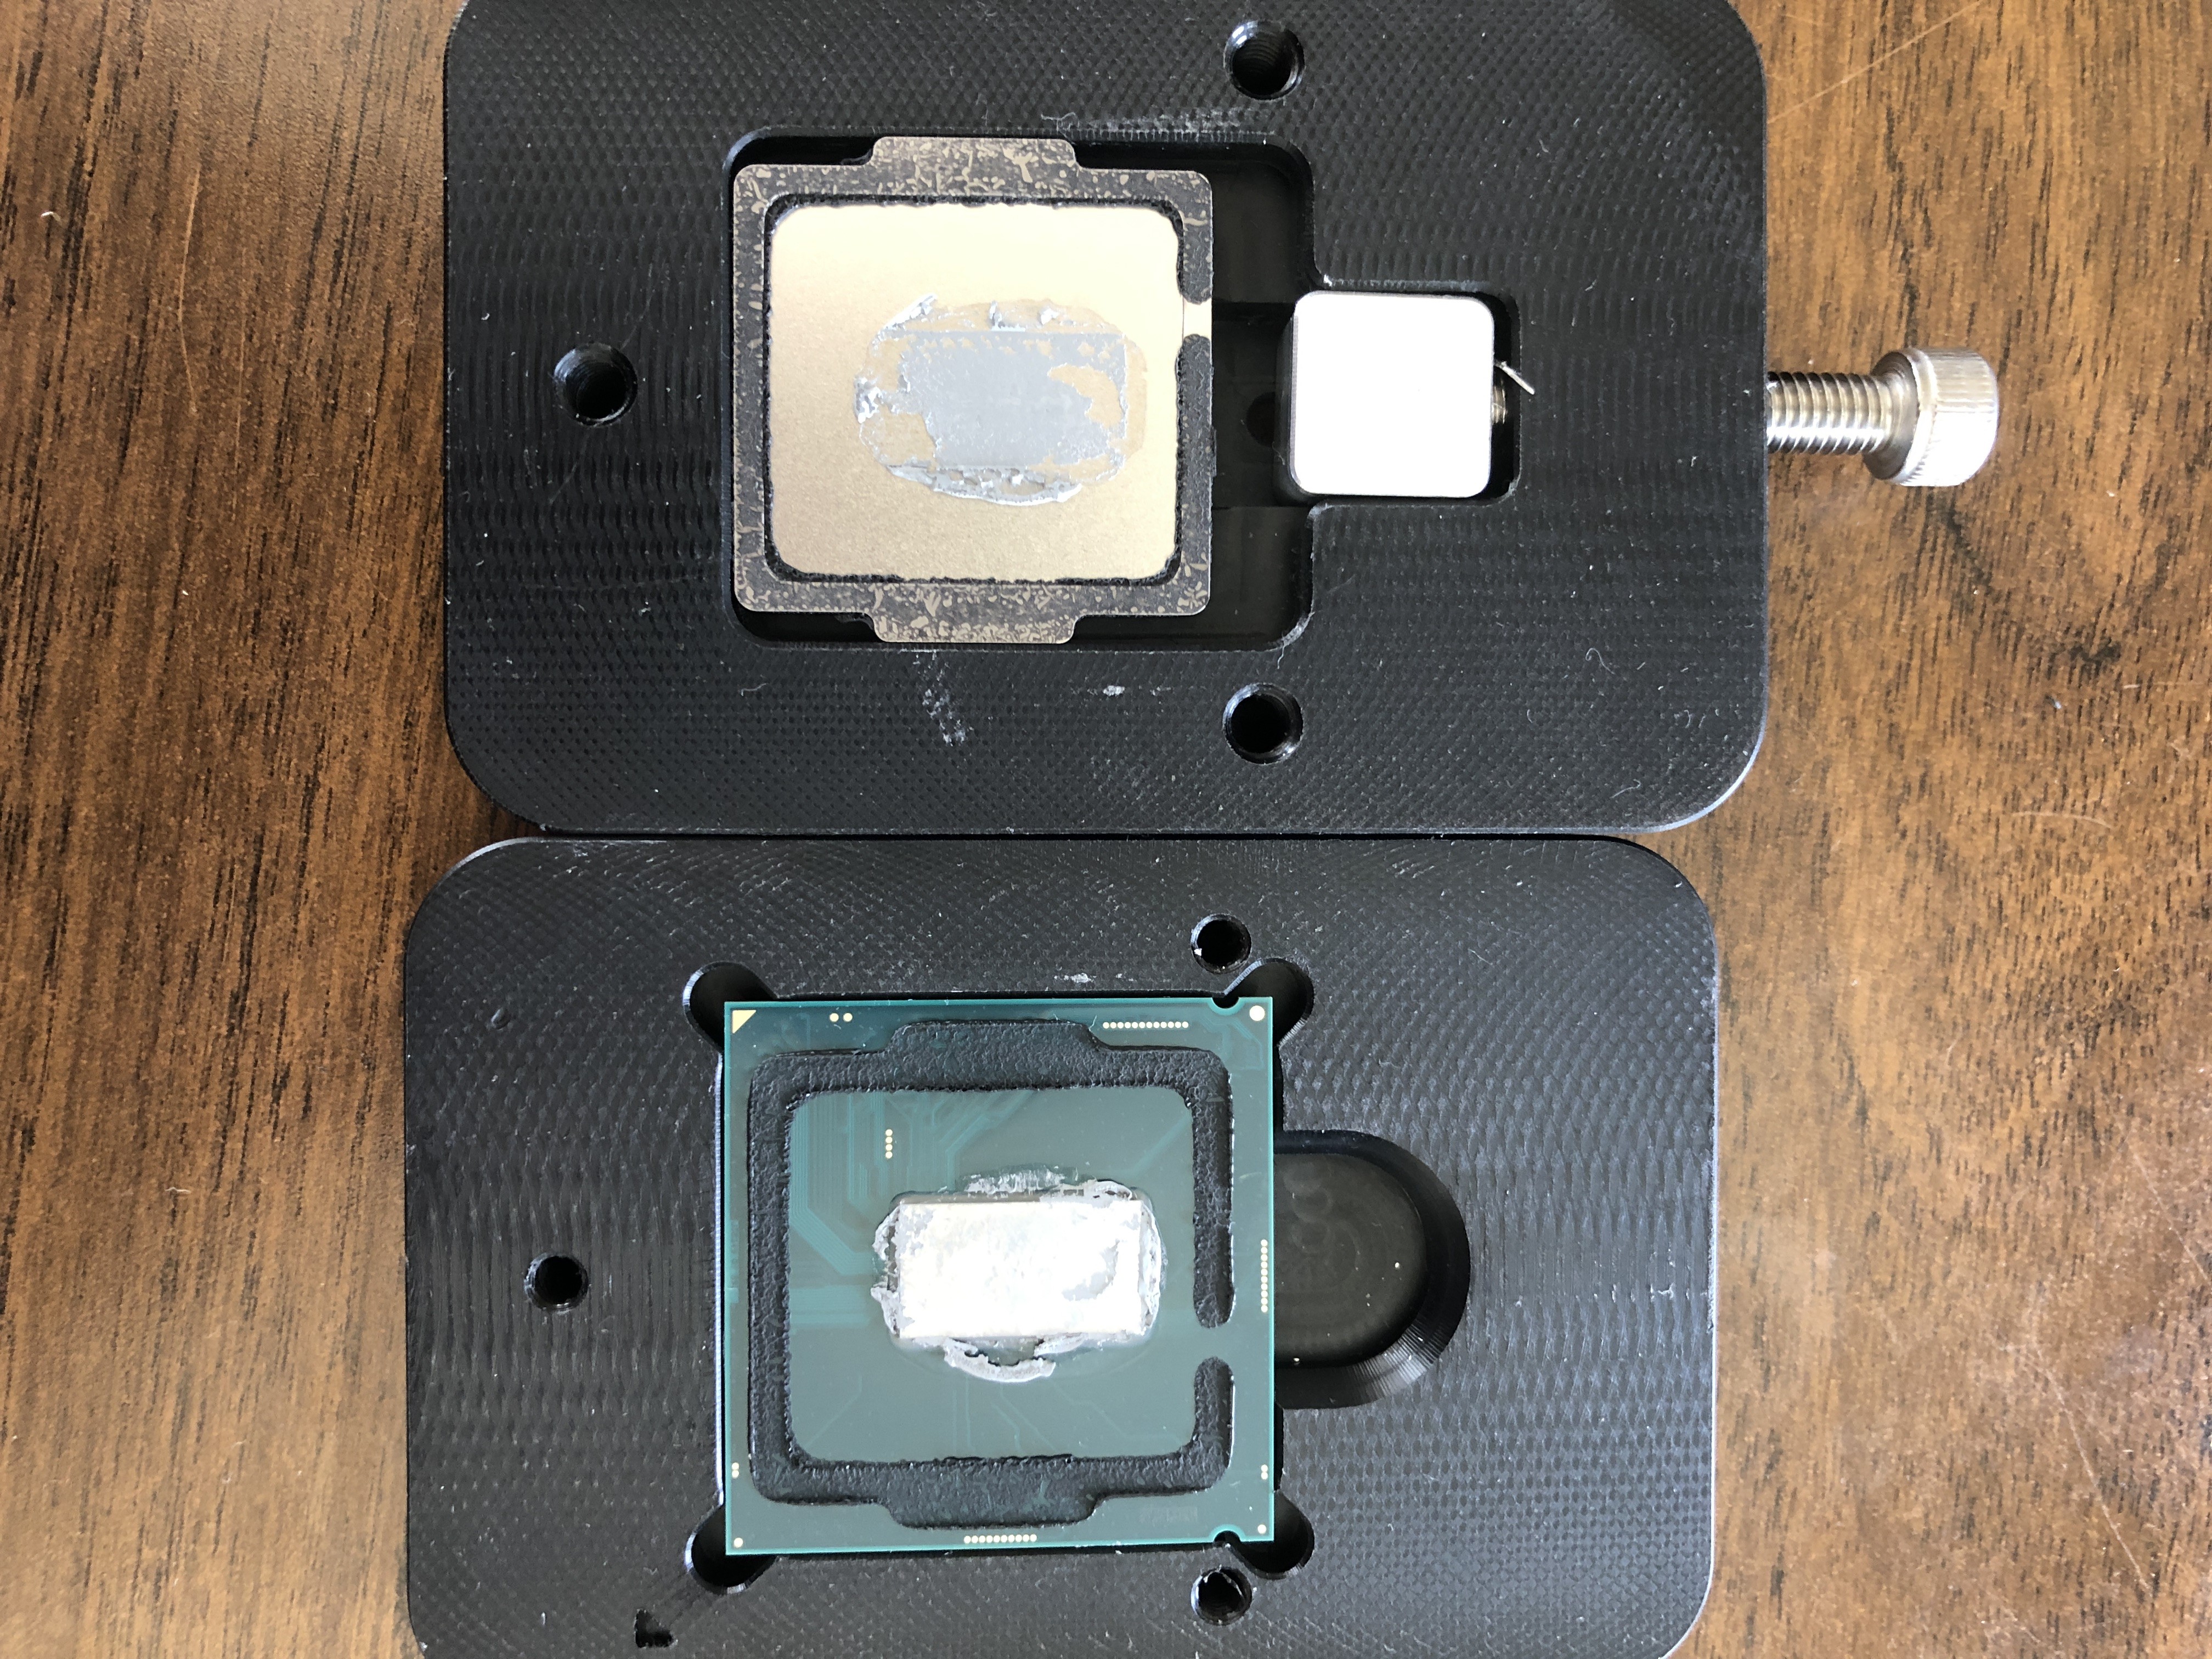
This build really tipped me over the edge in world of custom PCs. I learned how to read and write pinout diagrams so I could build my own custom cables to save on space. I also learned how to delid a CPU so liquid metal could be applied on the die to improve heat transfer. It was way out of my depth to take on a build like this but the final result is something I admire to this day.
Part List
- Case: Louqe Ghost S1 MkII
- CPU: Intel i7-8700K (delidded and pushed to 4.9Ghz OC)
- GPU: Nvidia GeForce RTX 2080 Super (undervolted)
- Motherboard: Gigabyte Z390 I AORUS PRO WIFI
- Cooler: Noctua NH-L12
- Memory: Corsair Vengeance LPX 32GB 3200Mhz
- Storage: Corsair Force MP500 960GB M.2 SSD
- Power: Corsair SF600 80 Plus Gold SFX
- Other: Noctua NF-A12x15 slim fans, MDPC-X cable sleeving
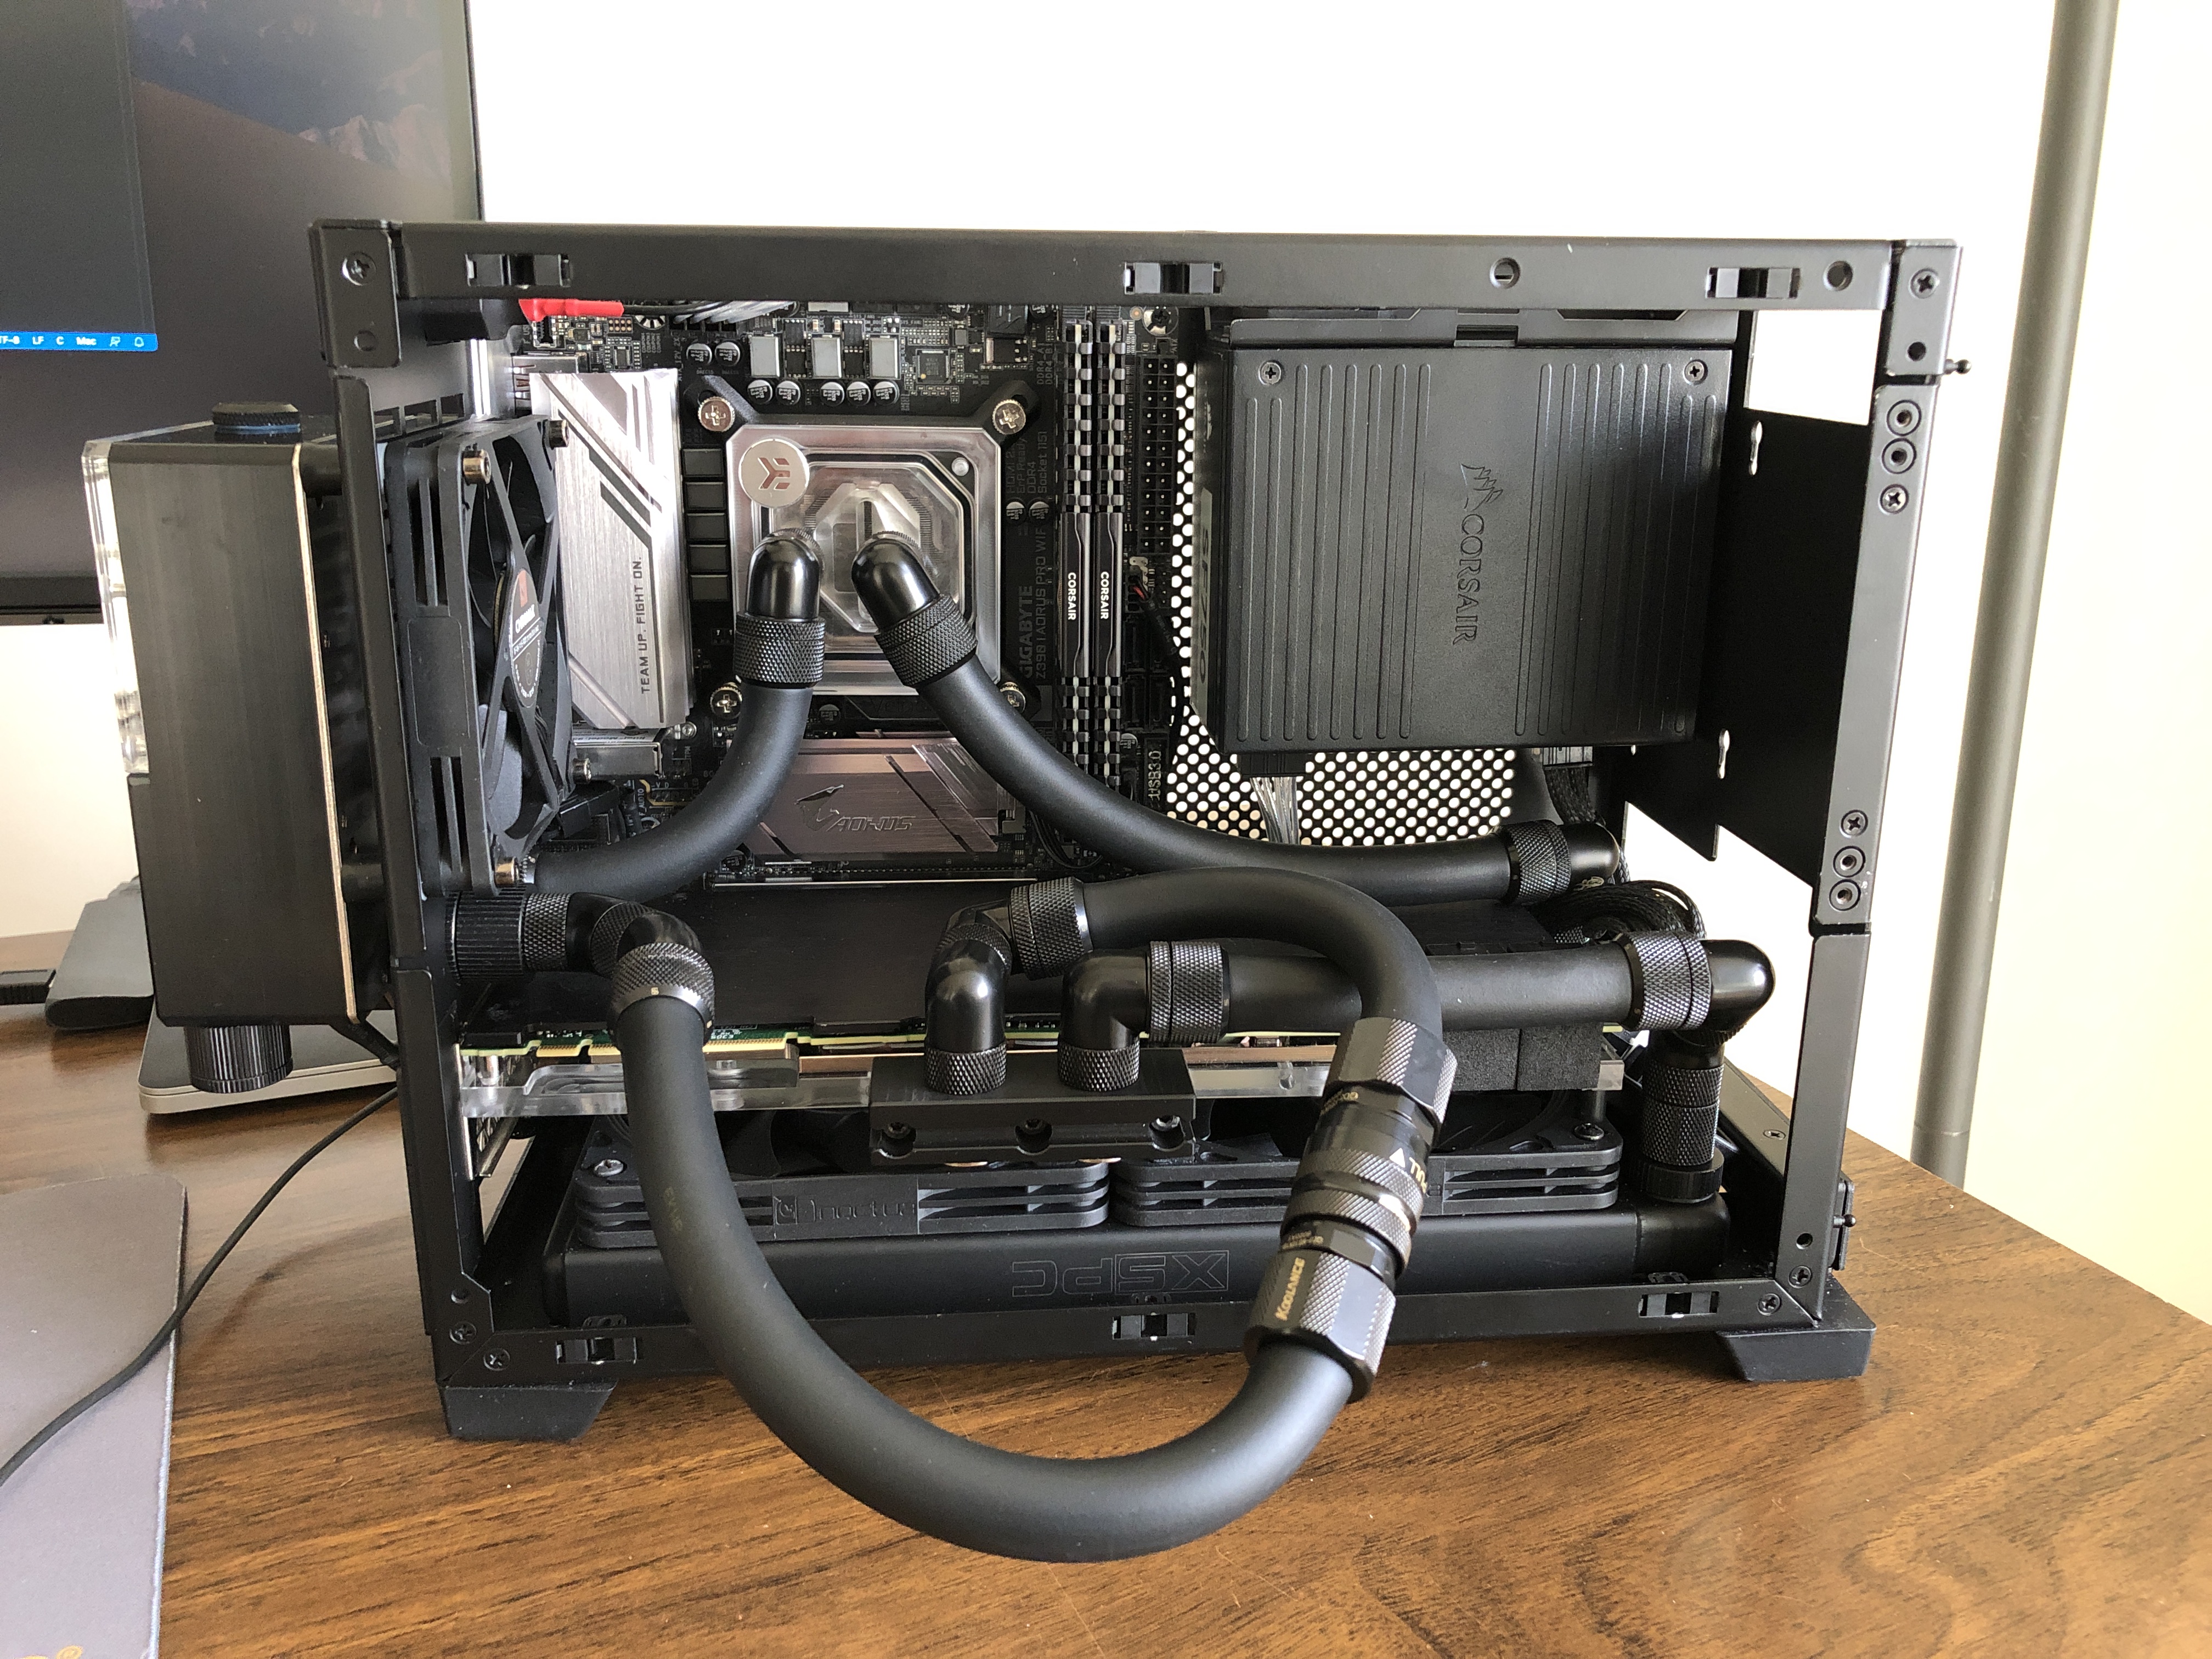
Ghost S1 (water cooled)
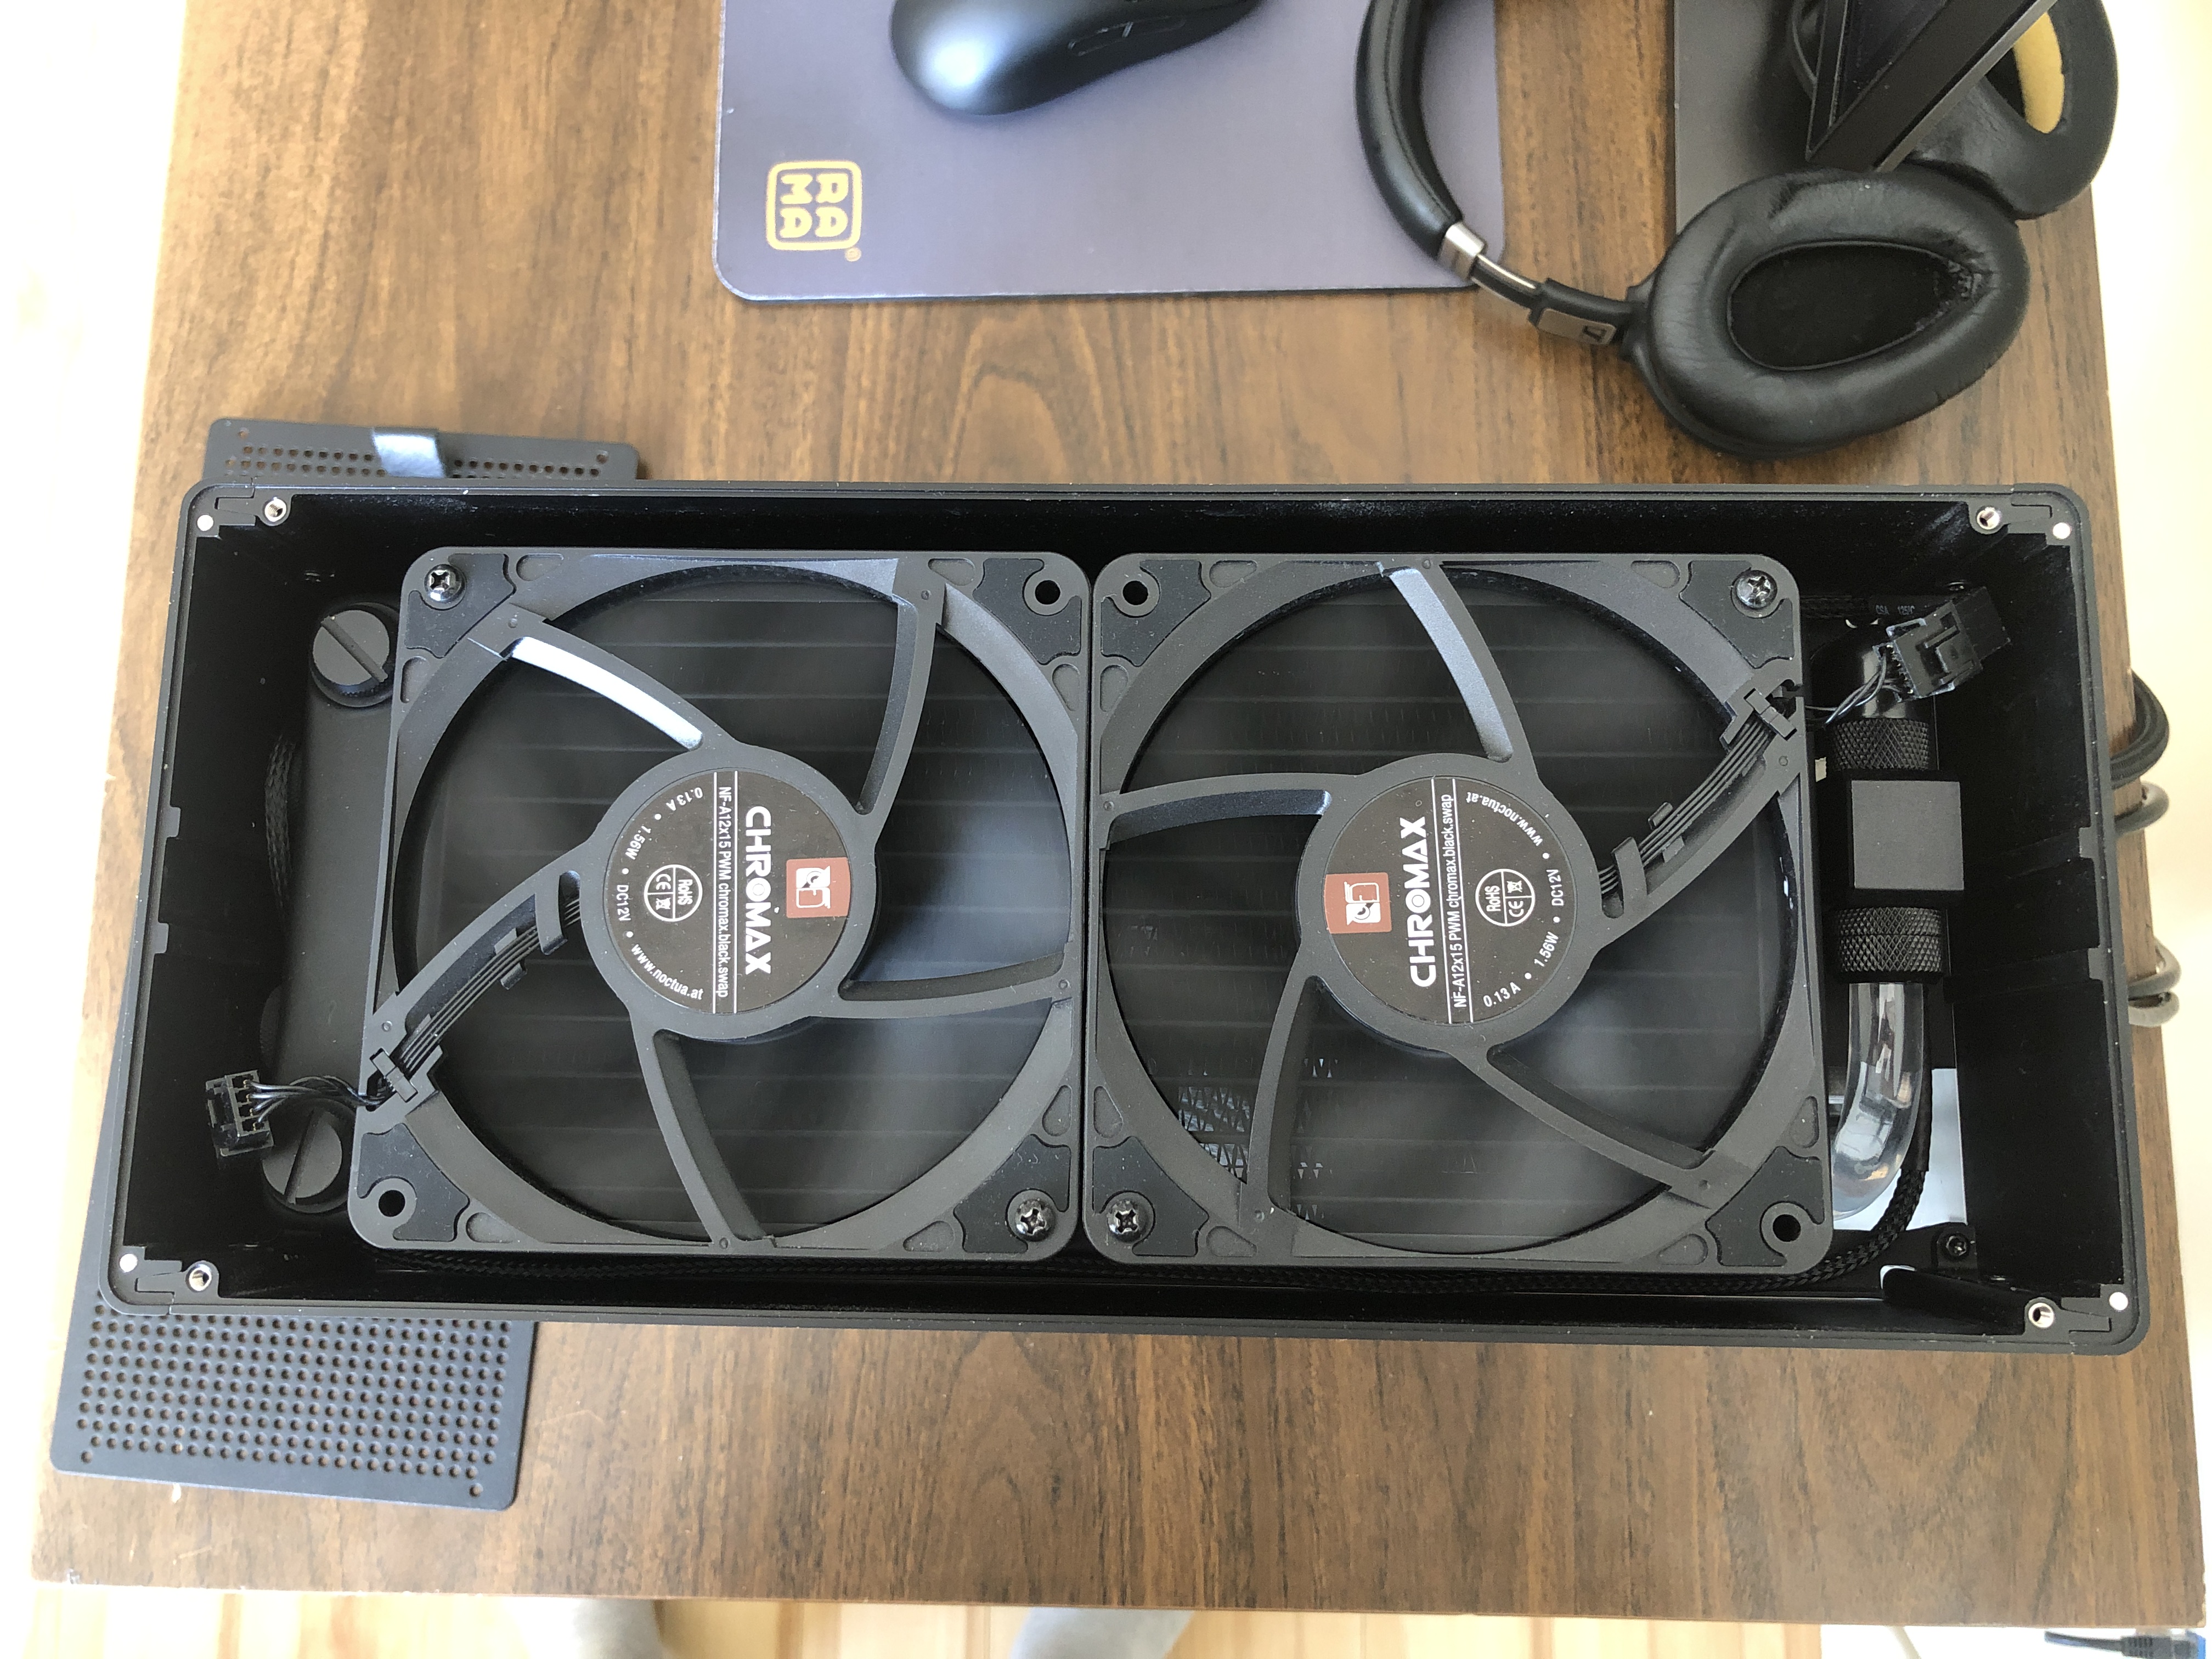
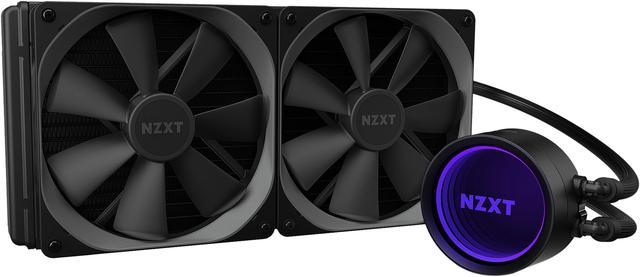
I’ve found that most people who’ve built a PC tend to stick with air cooling. If they switch to water cooling, it’s typically for an off the shelf AIO like the NZXT Kraken x63 or Corsair H100i. There’s a pretty good reason to stick with air cooling or AIO’s if you don’t really care about the upper limits of performance. Custom loops are expensive, they require lots of planning for bends or tubing runs, and need more maintenance. On the flip side, for those bold enough to try, there are serious performance gains and a lot of self satisfaction. There are also many active communities with great resources and knowledgeable users to help guide you through, which is a large reason why I decided to try it myself.
The second evolution of my Loque Ghost S1 was to install a hard line loop because I was bored during COVID
to reduce the upper range temperatures on my CPU and GPU (82° to 90°). I chose hard tubing over soft tubing
because at the time having hard tubing in an SFF PC was a big flex. Naively, I thought I could just buy the
tubing, mandrels, fittings and have it all come together. I was very wrong, and underestimated just how
difficult bending tubes on short runs was going to be. I wasted many tubes by overheating, kinking or
creating the wrong bend. It was a painful ride, and didn’t turn out like I had envisioned.
Part List
- Case: Louqe Ghost S1 MkII
- CPU: Intel i7-8700K (delidded)
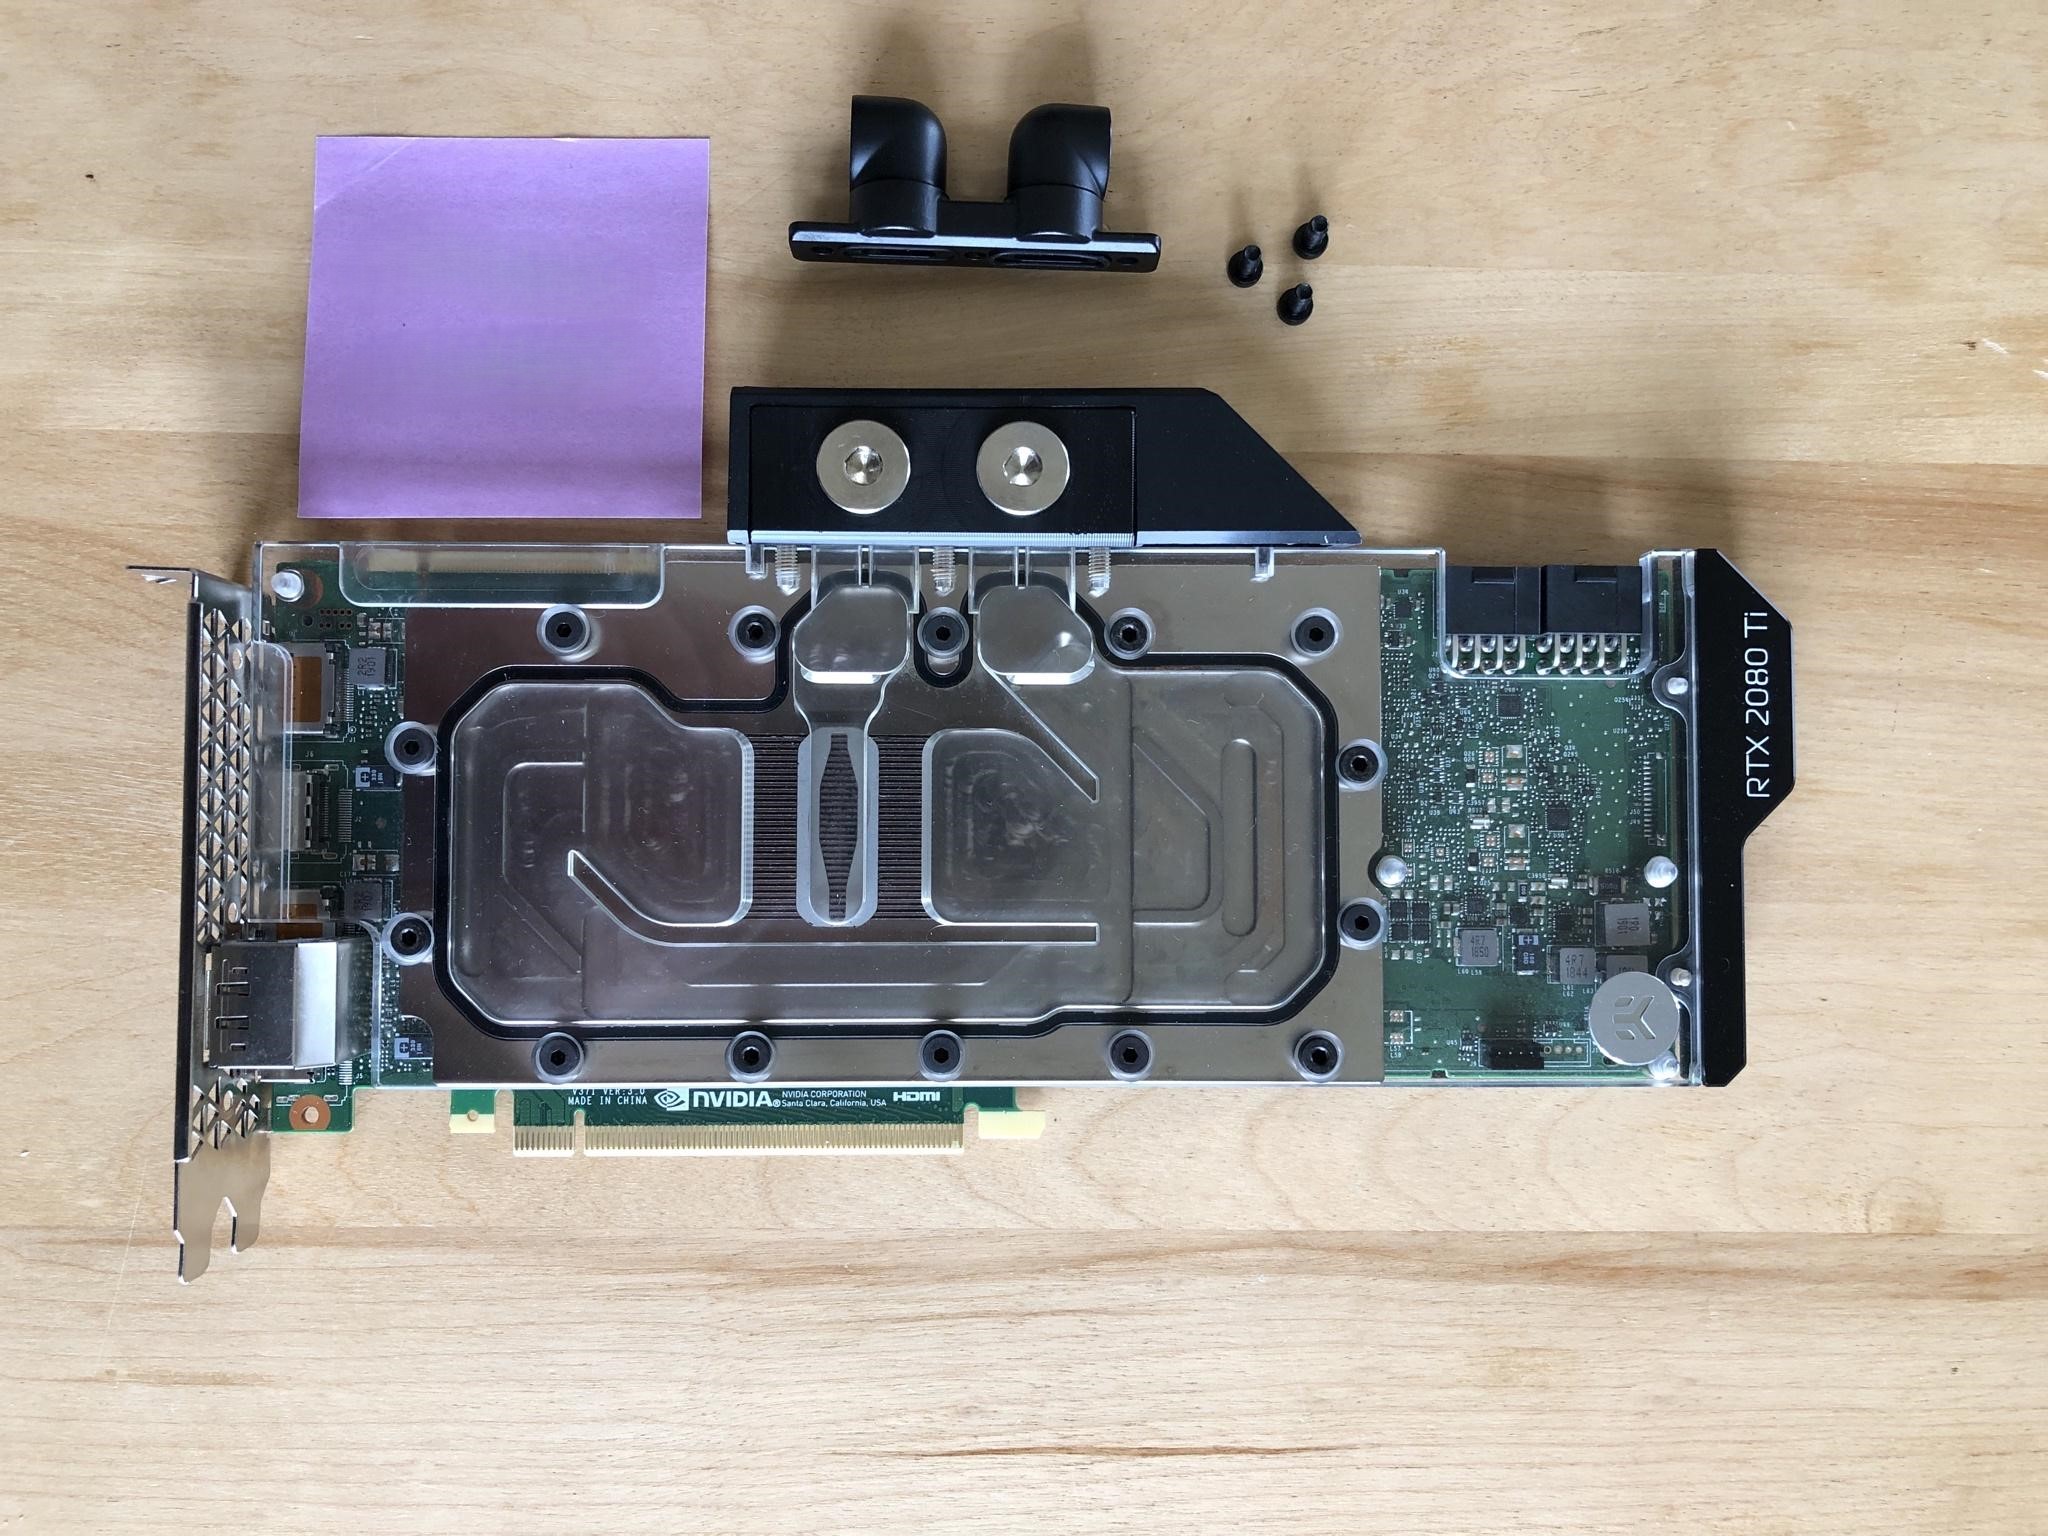
- GPU: Nvidia GeForce RTX 2080 Ti (undervolted)
- Motherboard: Gigabyte Z390 I AORUS PRO WIFI
- Memory: Corsair Vengeance LPX 32GB 3200Mhz
- Storage: Corsair Force MP500 960GB M.2 SSD
- Power: Corsair SF600 80 Plus Gold SFX
- Other: Noctua NF-A12x15 slim fans, EK-DDC 3.2 PWM pump, EKWB DDC heatsink, Aquacomputer Quadro, Aquacomputer High Flow NEXT flow meter, Rockit Cool direct die kit XSPC RX240 Radiator, Barrow & EBWB fittings
Ncase M1
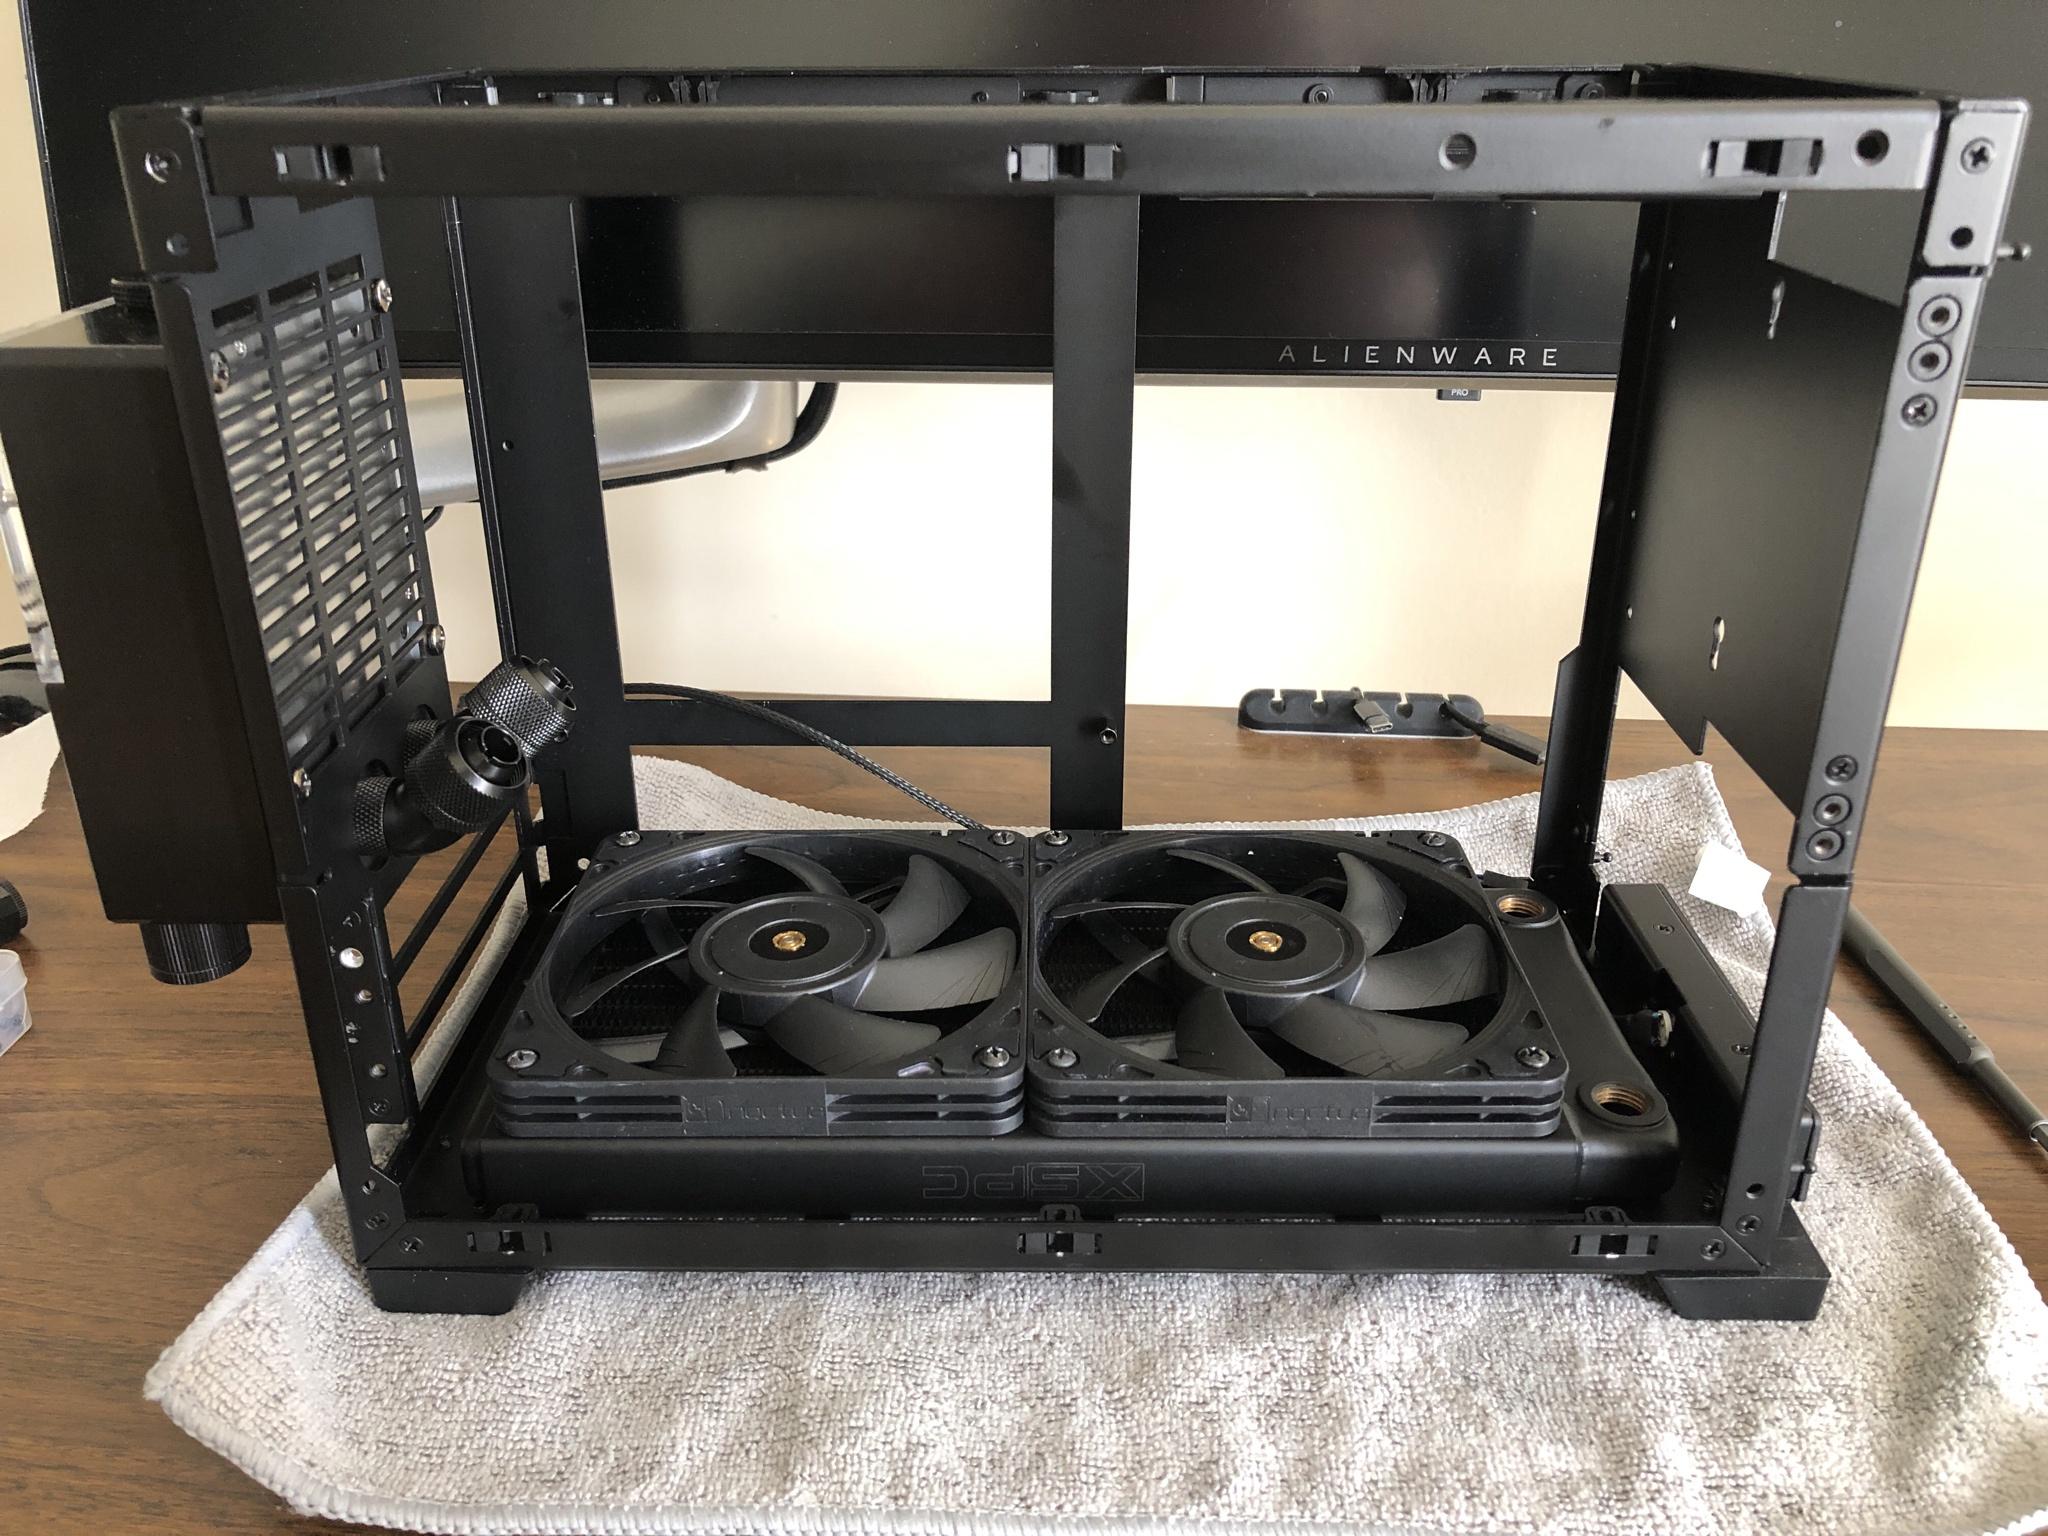
Once I first climbed down the rabbit hole of PC building, I came across a rising YouTuber by the name of OptimumTech. Optimum was all about building SFF PCs, and at the time he was modding an NCase M1 with some pretty unique style. He was making his own custom length cables, 3D printing case feet to improve air flow and adding a tempered glass side panel. He was carving out a niche in YouTube PC building and his projects inspired me to do some of the same. A short while after I sold my first PC, an NCase came up for sale on Kijiji without a GPU. It was an attractive starter project so I bought it. The project was short lived, and I ended up parting out much of that build including the case, to fund a build in the popular Louqe Ghost S1.
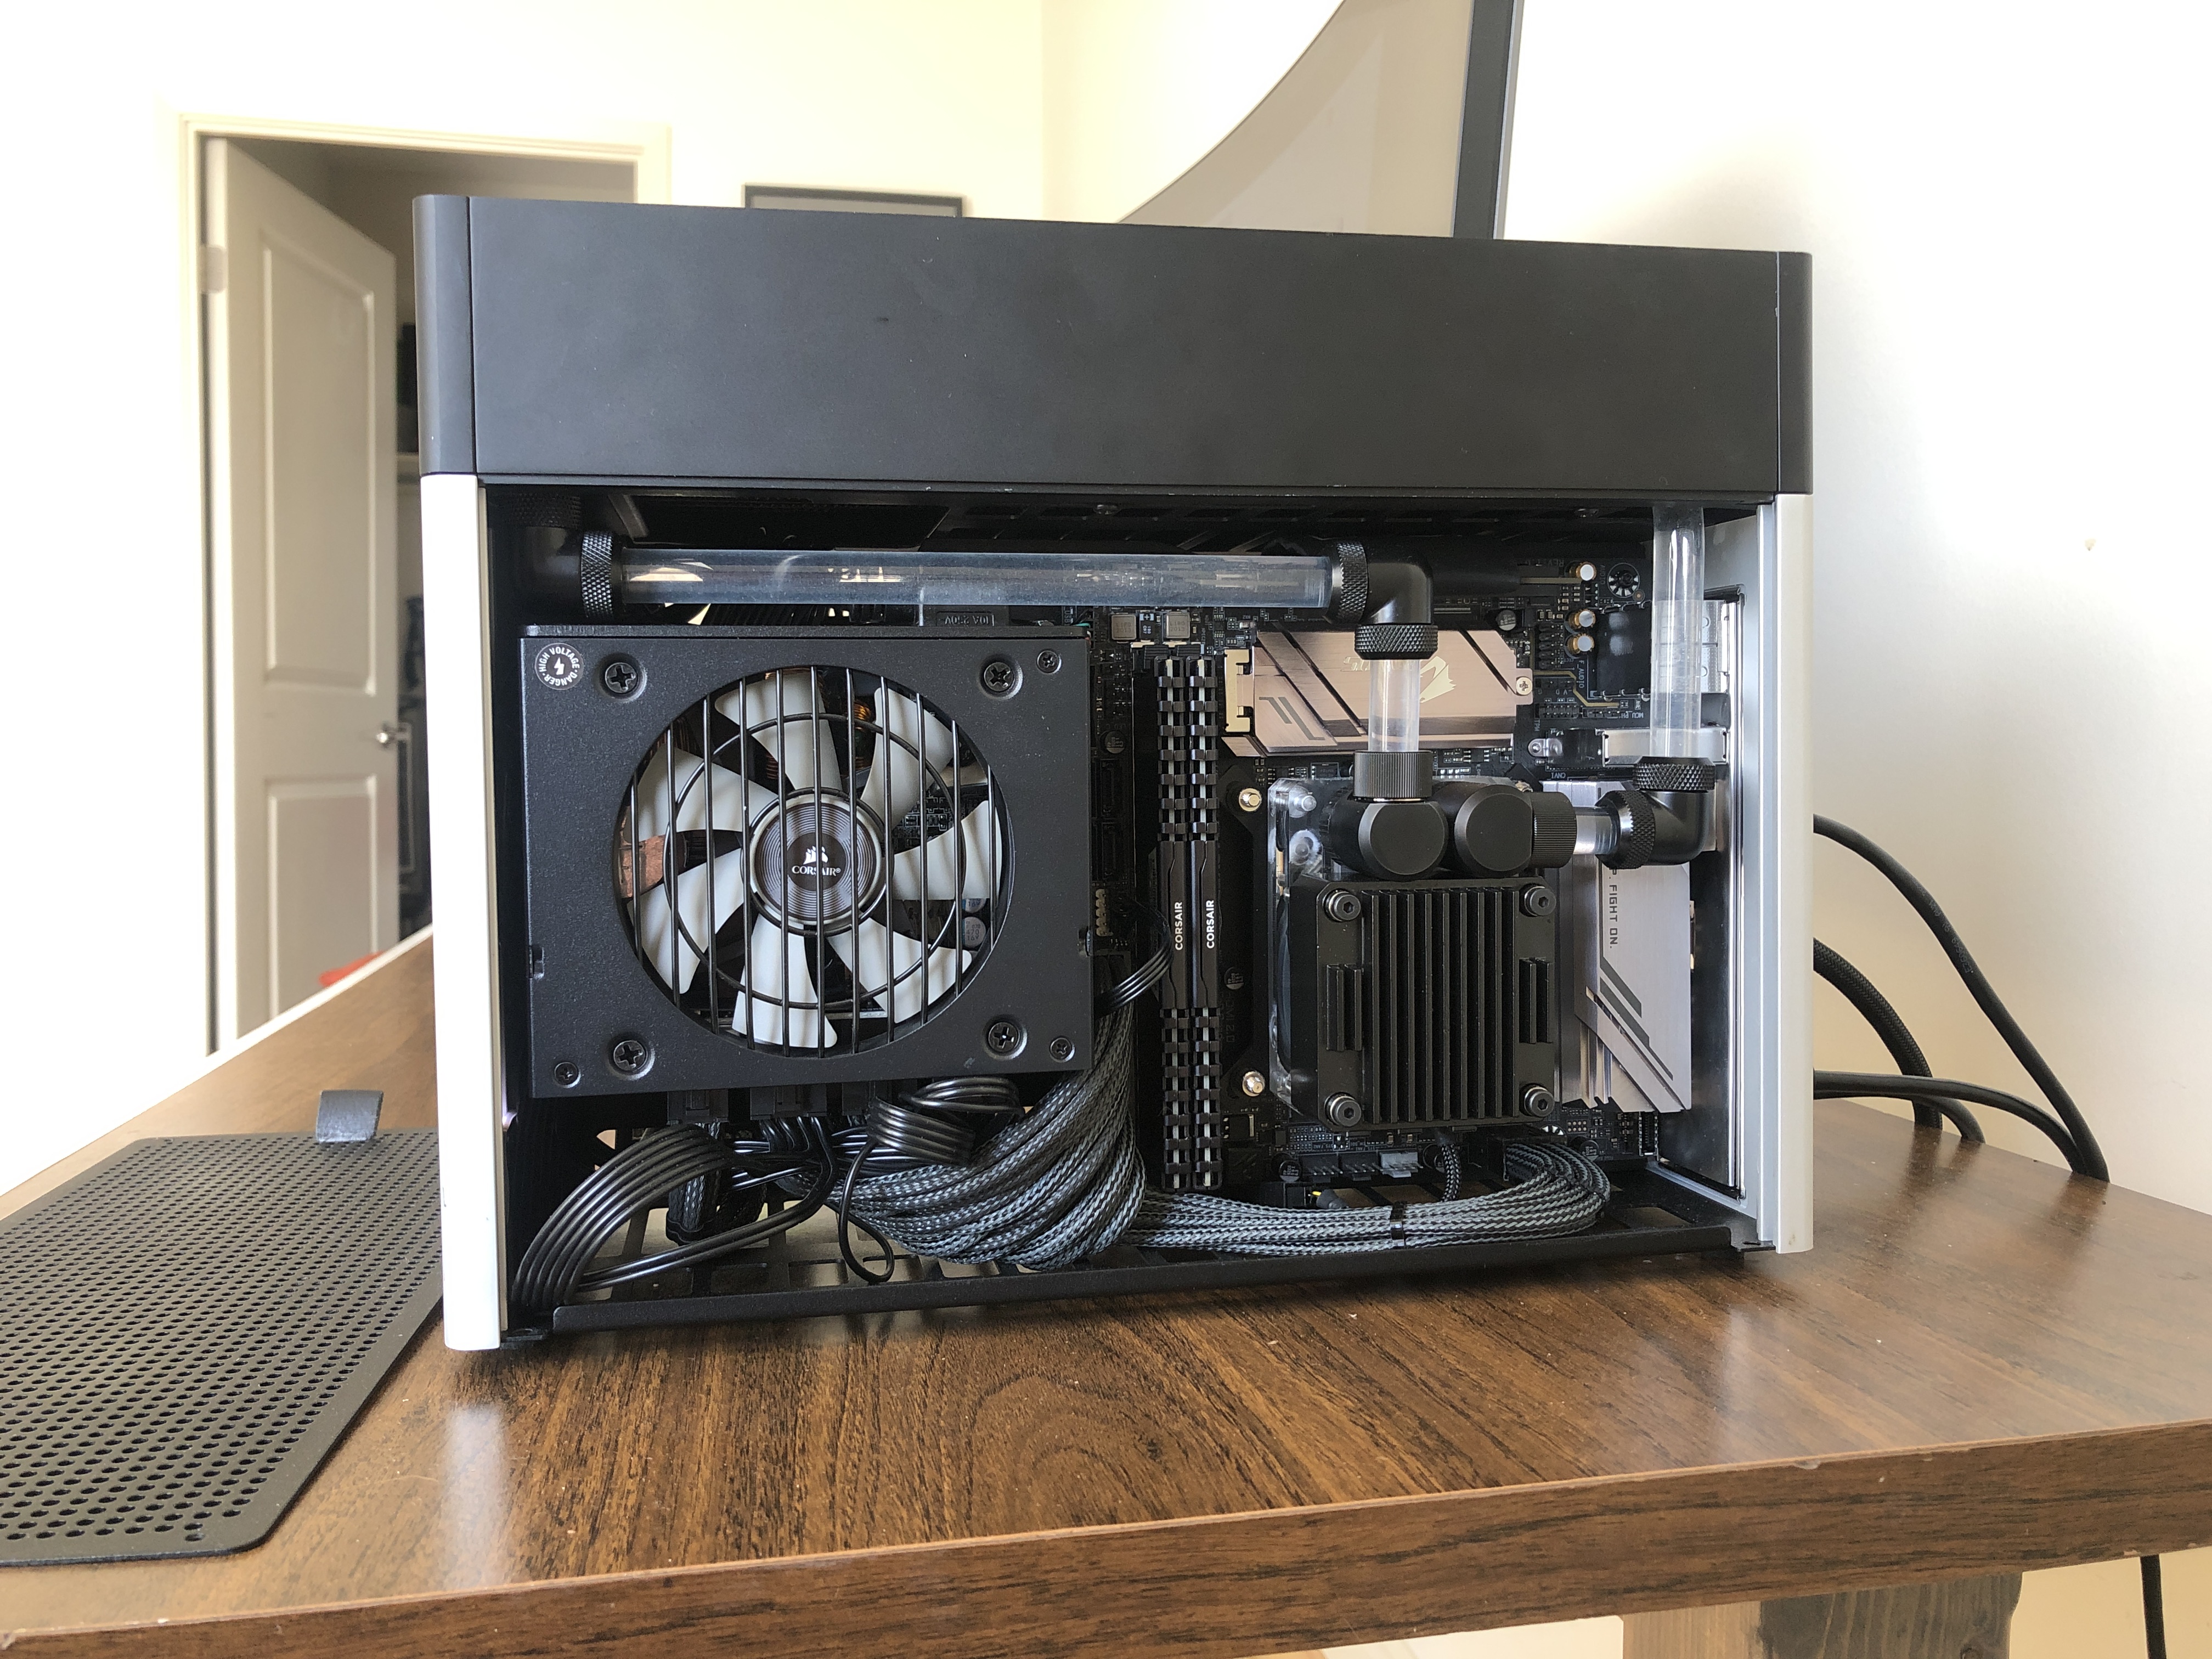
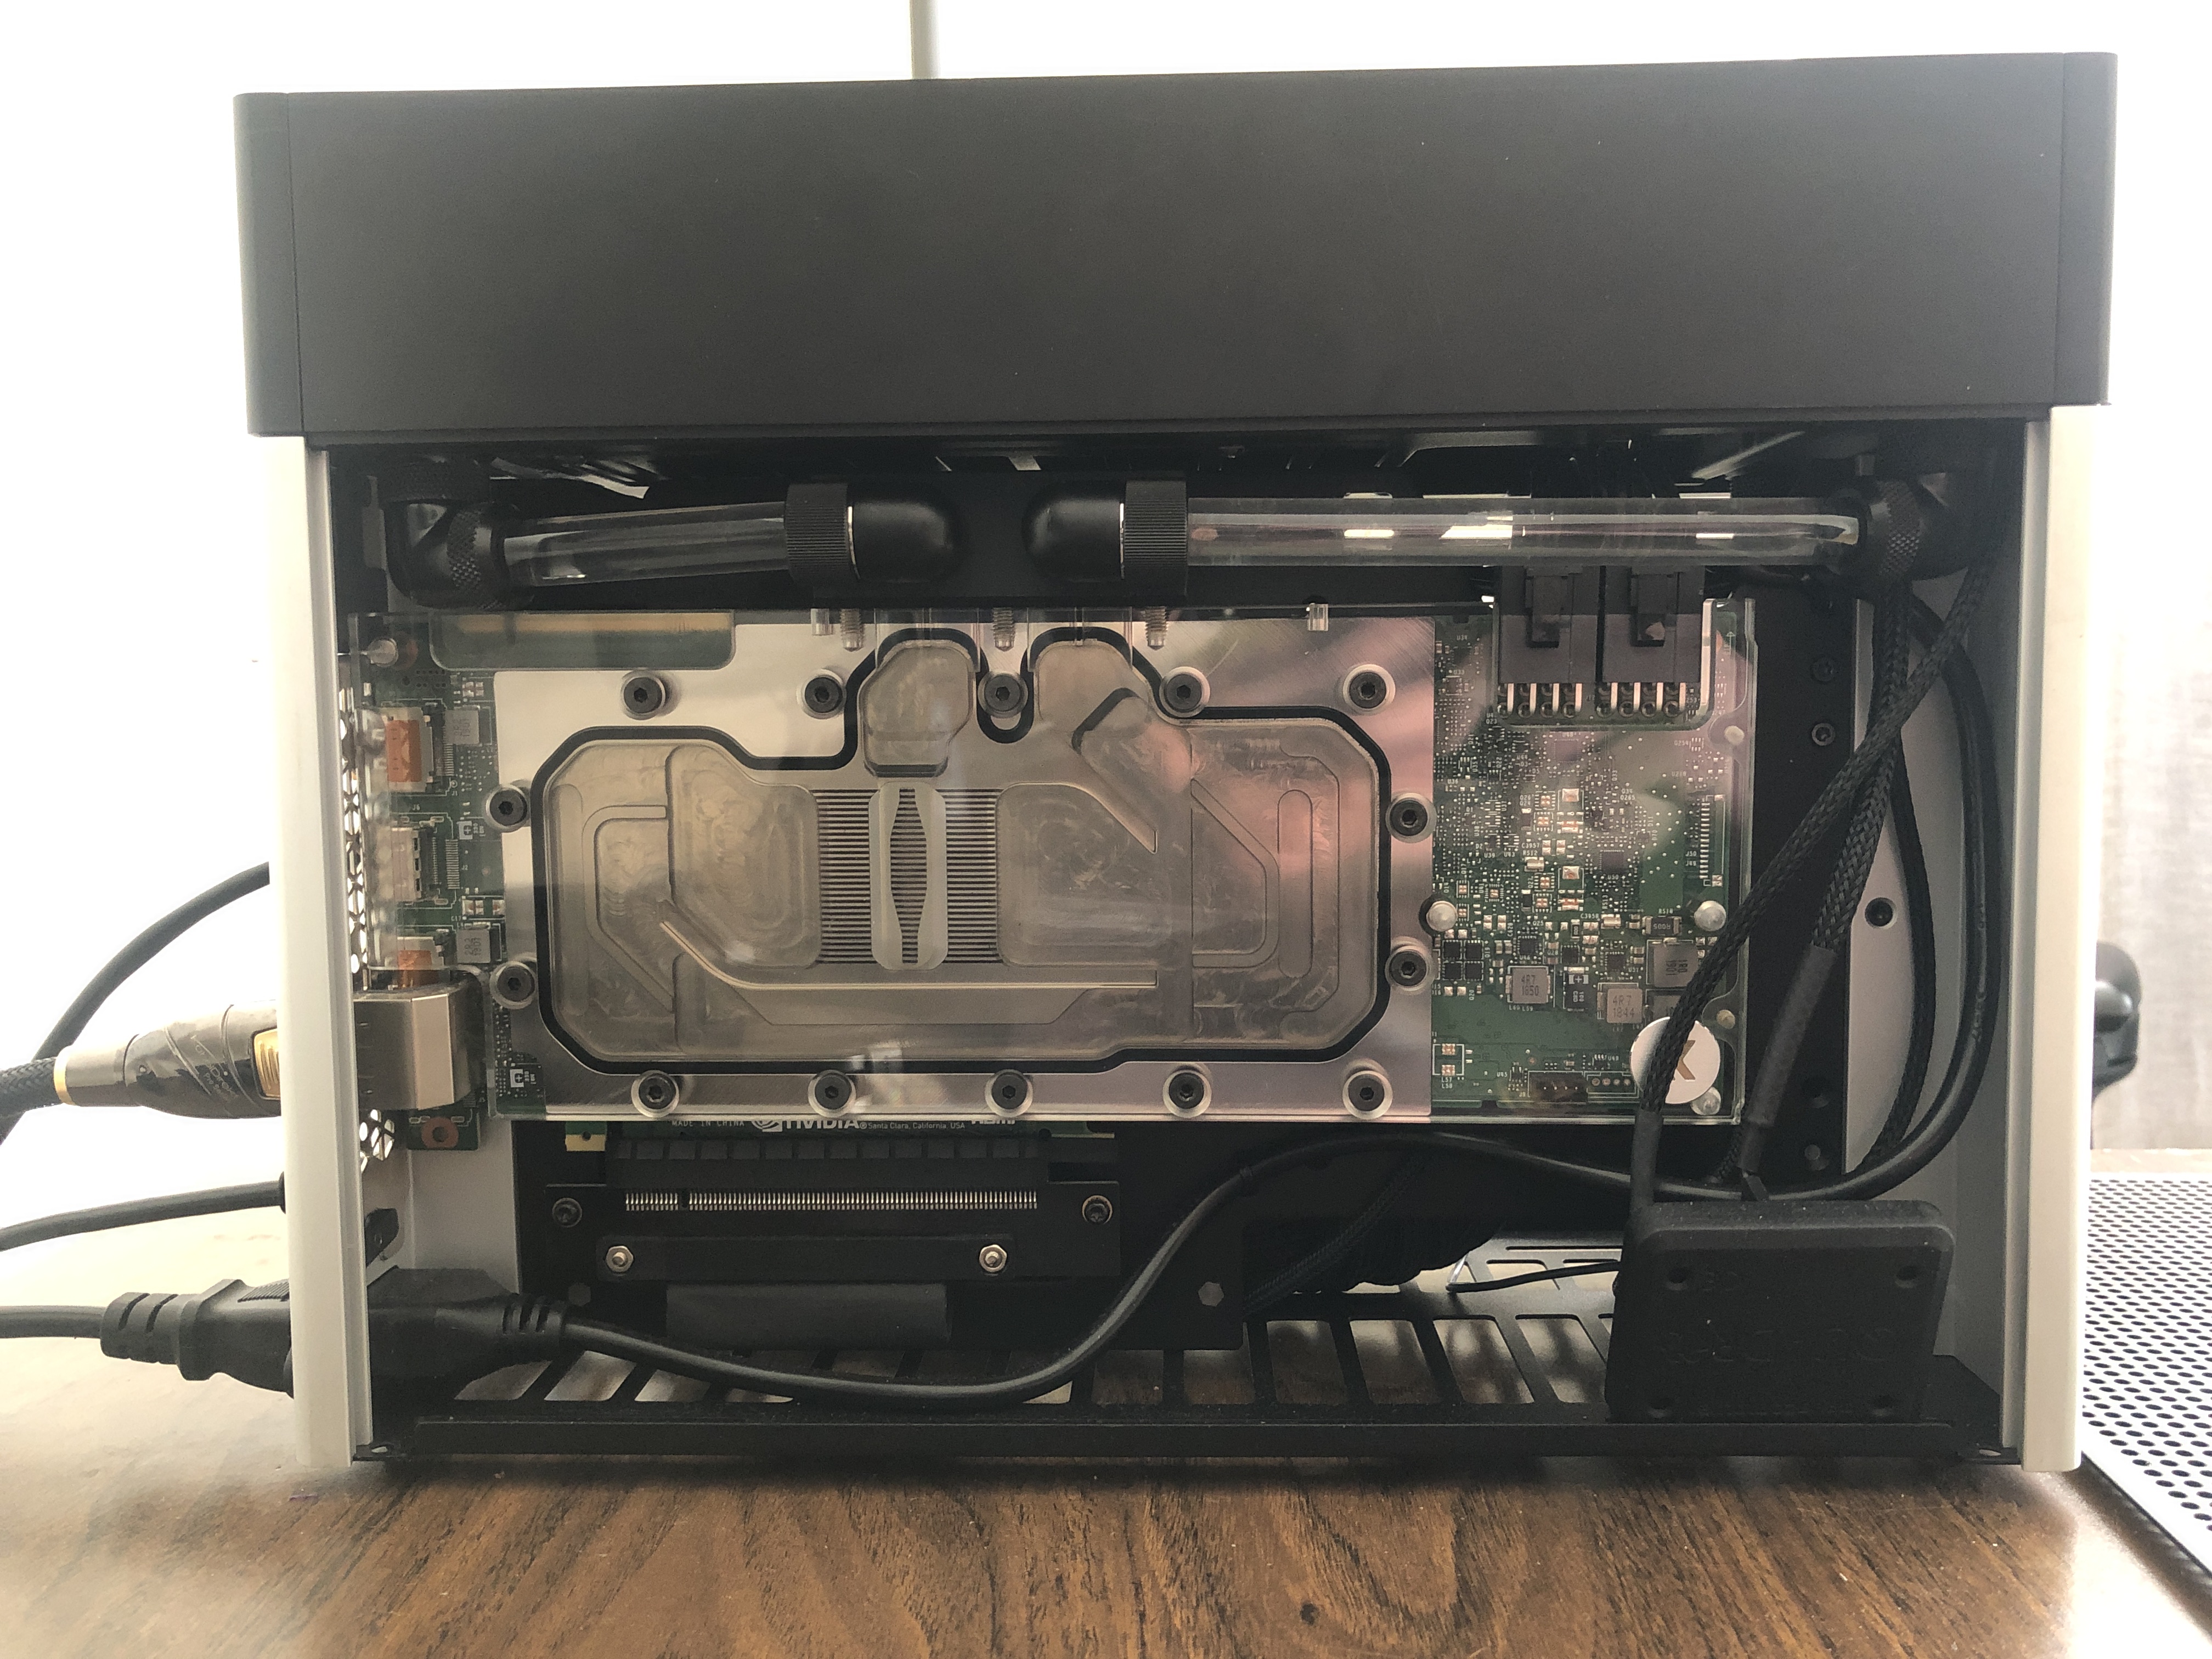
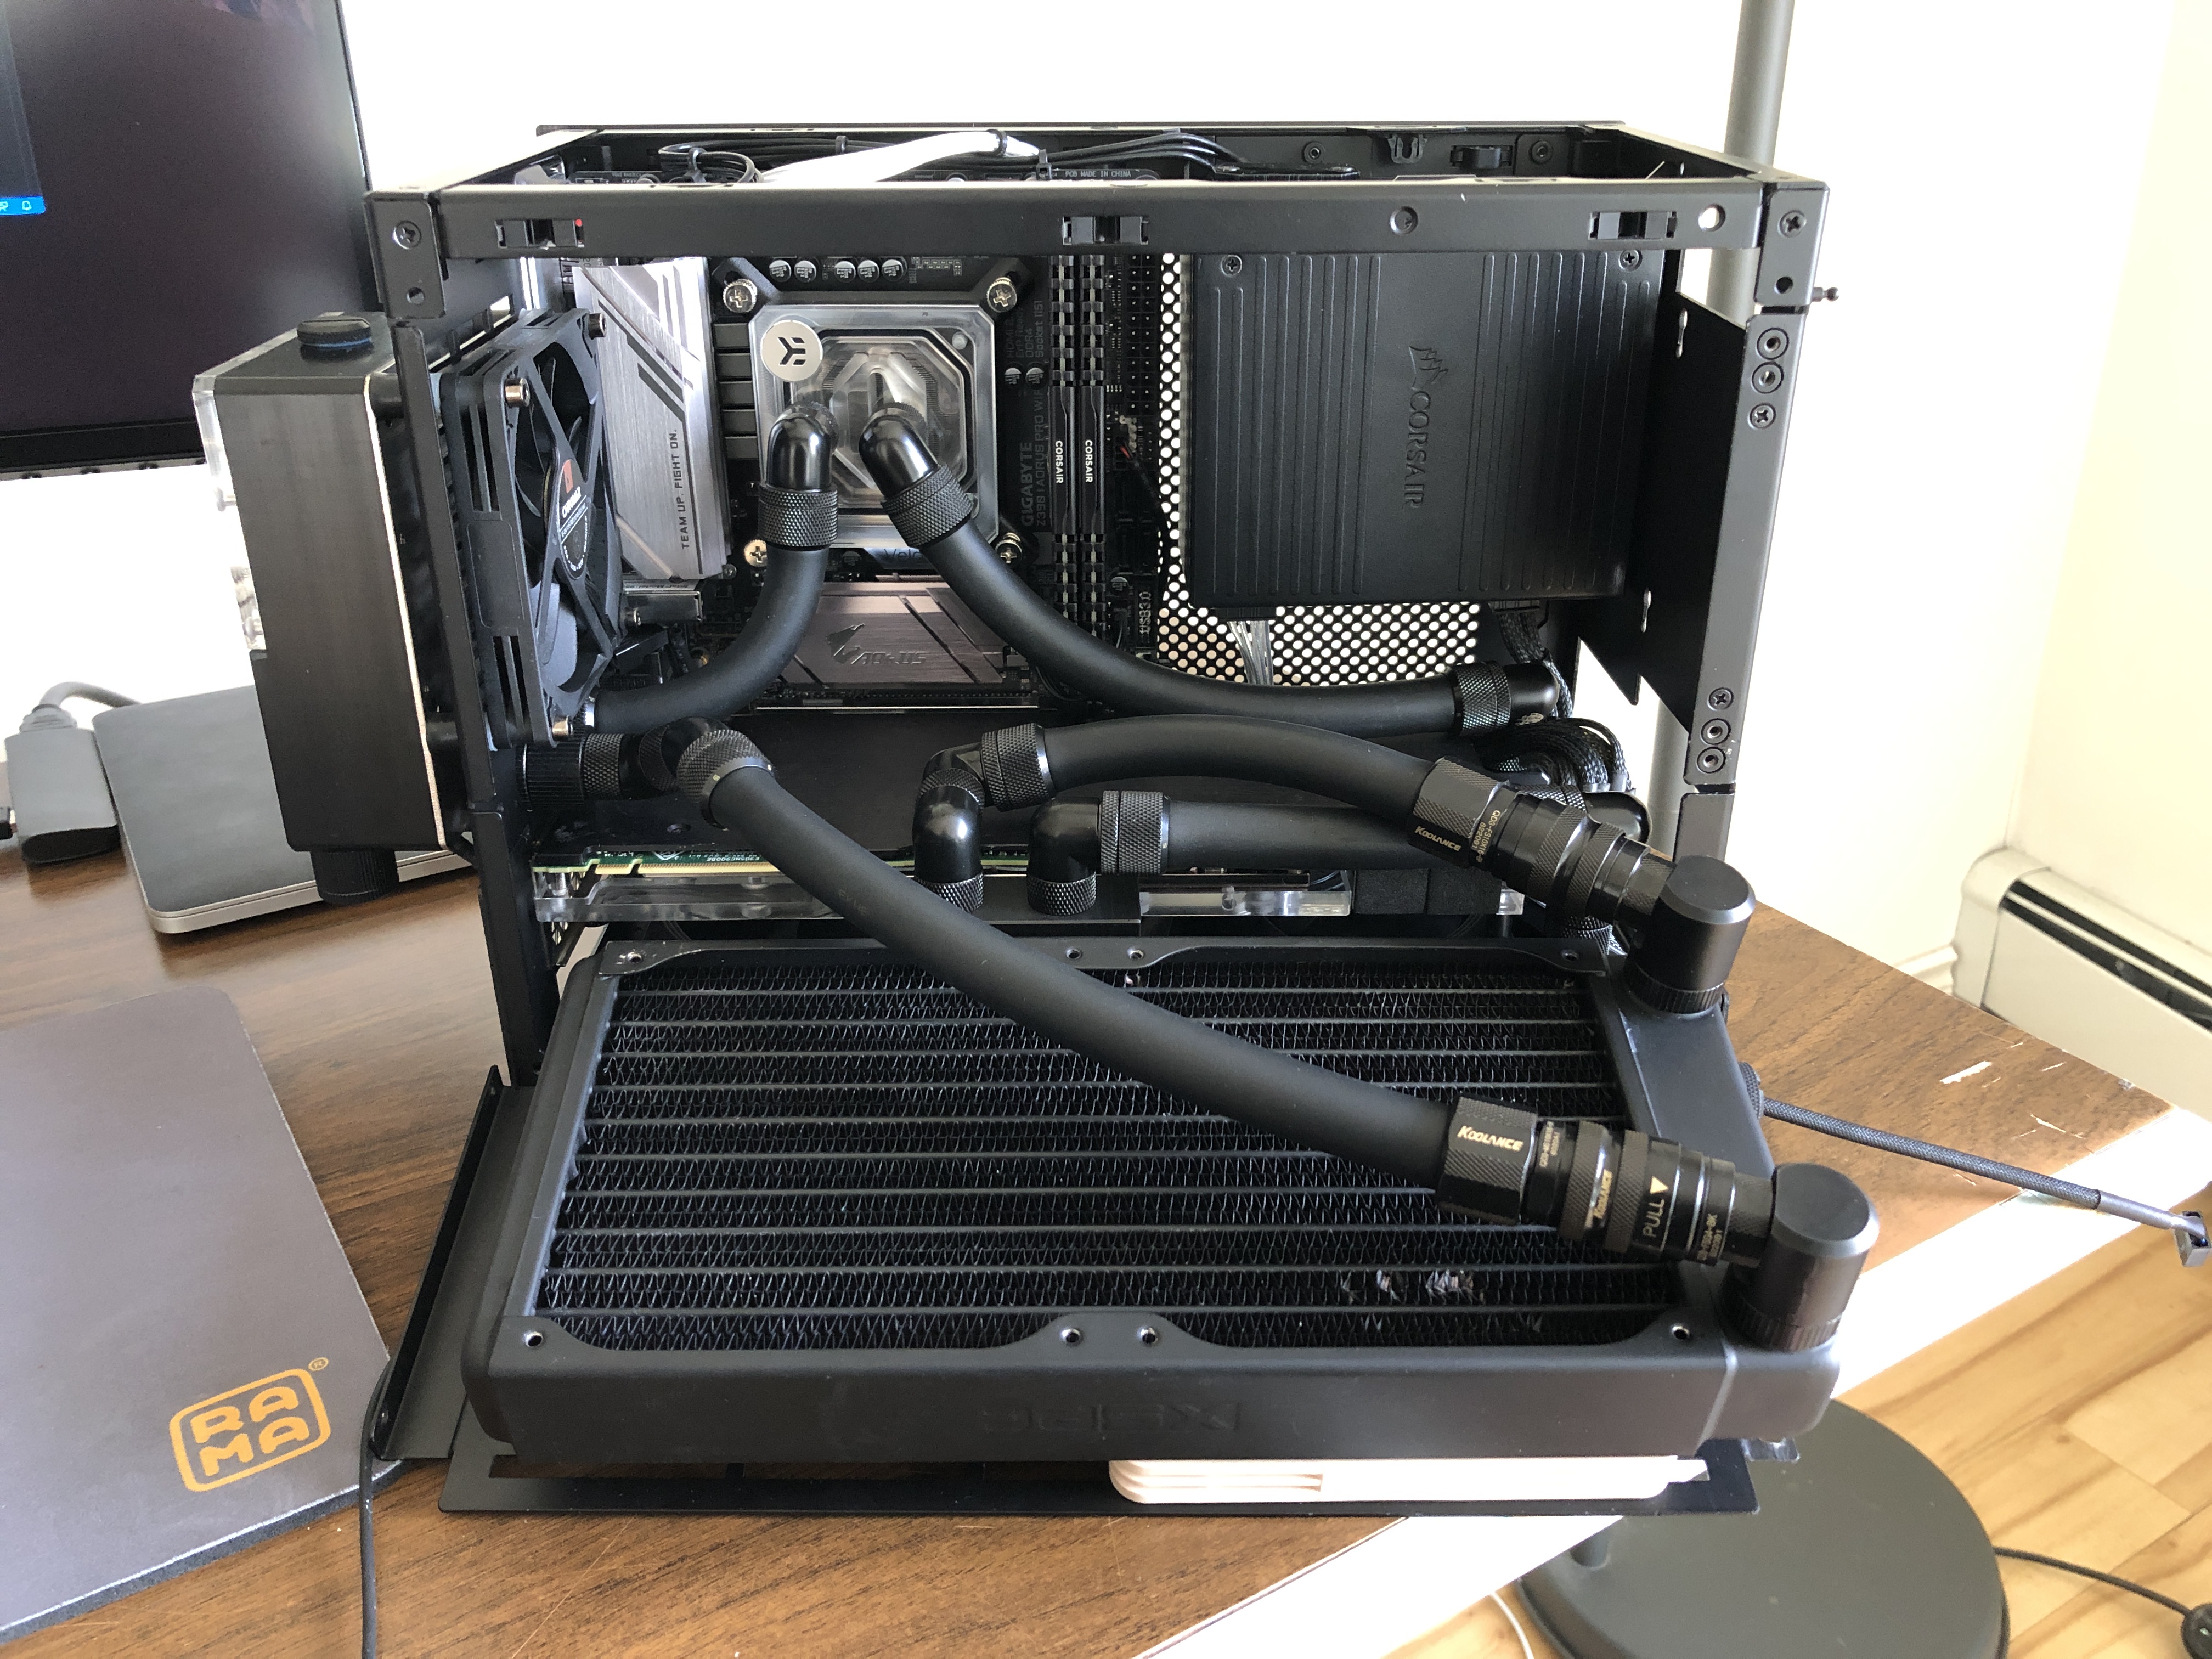
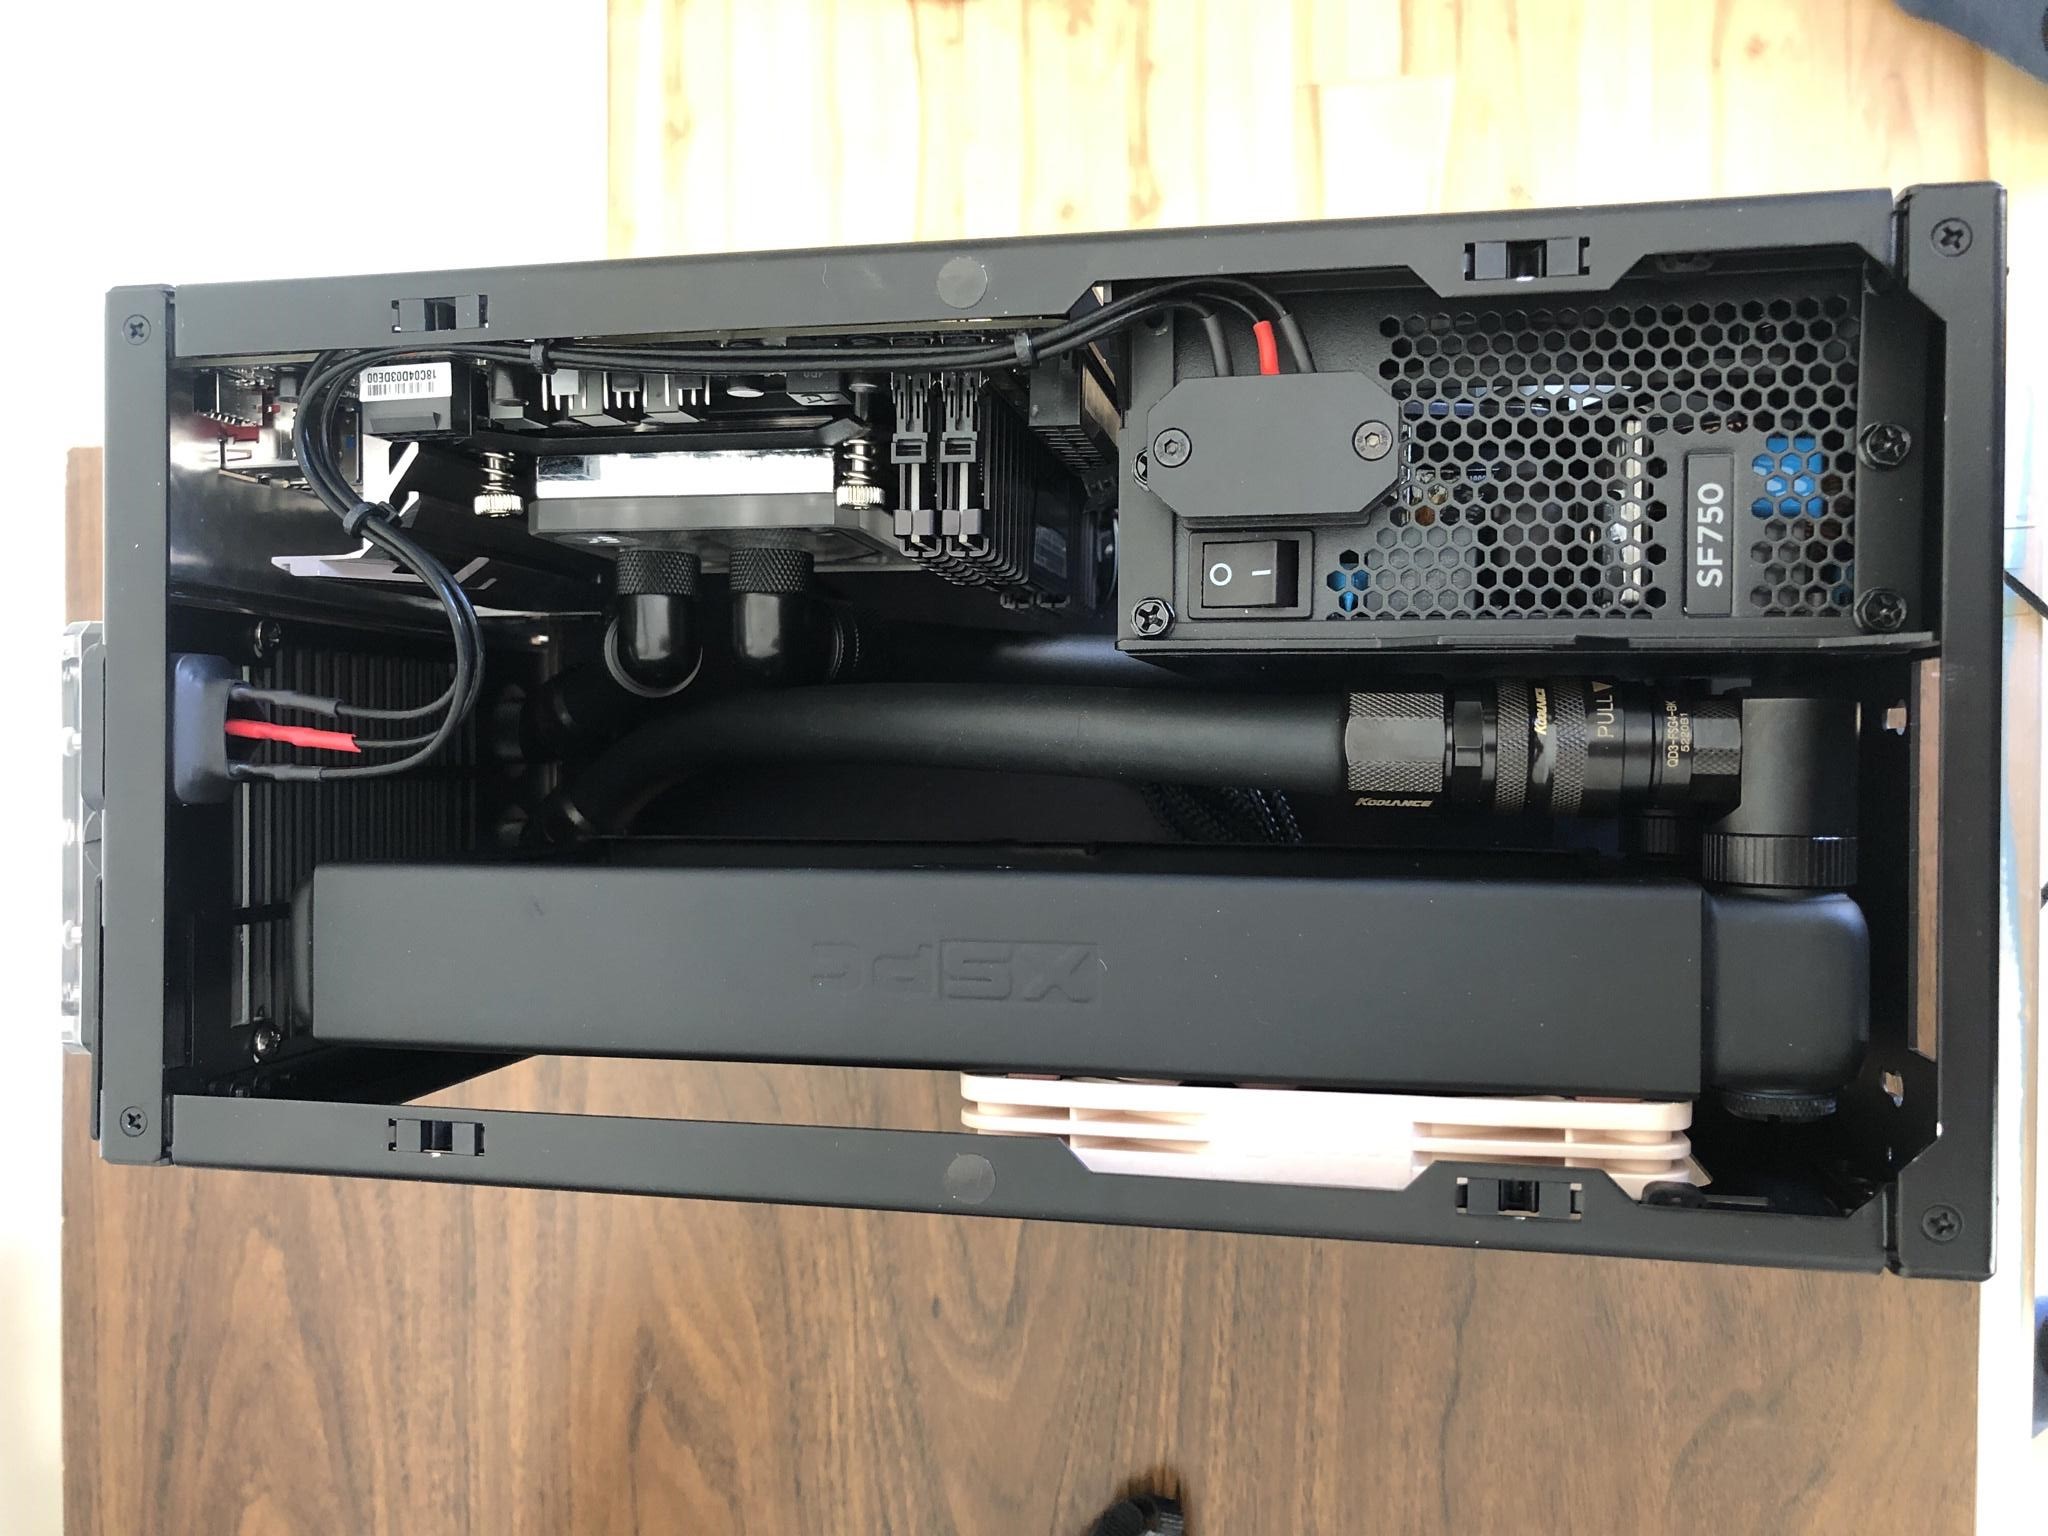
A few years and many dollars later, I found another NCase M1 for sale on r/hardwareswap which I decided to buy. The intentions were much different this time. I was inspired by Optimum’s dual radiator build, with the idea of maxing out the performance of this case. After some watercooling experience in the Ghost S1, I knew some of the challenges I was likely going to face and picked my parts accordingly. This time I went for the matte black soft tube. It made life much easier to build and maintain, as the side panel could be removed thanks to Koolance’s Quick Disconnect fittings. I cut and crimped custom length cables so that space could be left for tubing and fan clearance. I used my Aquacomputer Quadro to orchestrate my pump, all the fans and temperature sensors so that it could be controlled from a single interface. It came together just like I had hoped. I felt like I had accomplished what I set out to do, and that brought me a lot of pride.
Part List
- Case: NCase M1 v6.1
- CPU: Intel i9-9900K (delidded)
- GPU: Nvidia GeForce RTX 2080 Ti (EK Nickel + Plexi waterblock)
- Motherboard: Gigabyte Z390 I AORUS PRO WIFI
- Memory: Corsair Vengeance LPX 32GB 3200Mhz
- Storage: Corsair Force MP500 960GB M.2 SSD, Samsung 850 Evo 500GB M.2
- Power: Corsair SF750 80 Plus Platinum SFX
- Other: Noctua NF-A12x15 slim fans, EK-DDC 3.2 PWM pump, EKWB DDC heatsink, Aquacomputer Quadro, Rockit Cool direct die kit, XSPC RX240 & TX240 radiators, Iceman DDC reservoir and Barrow & EBWB fittings
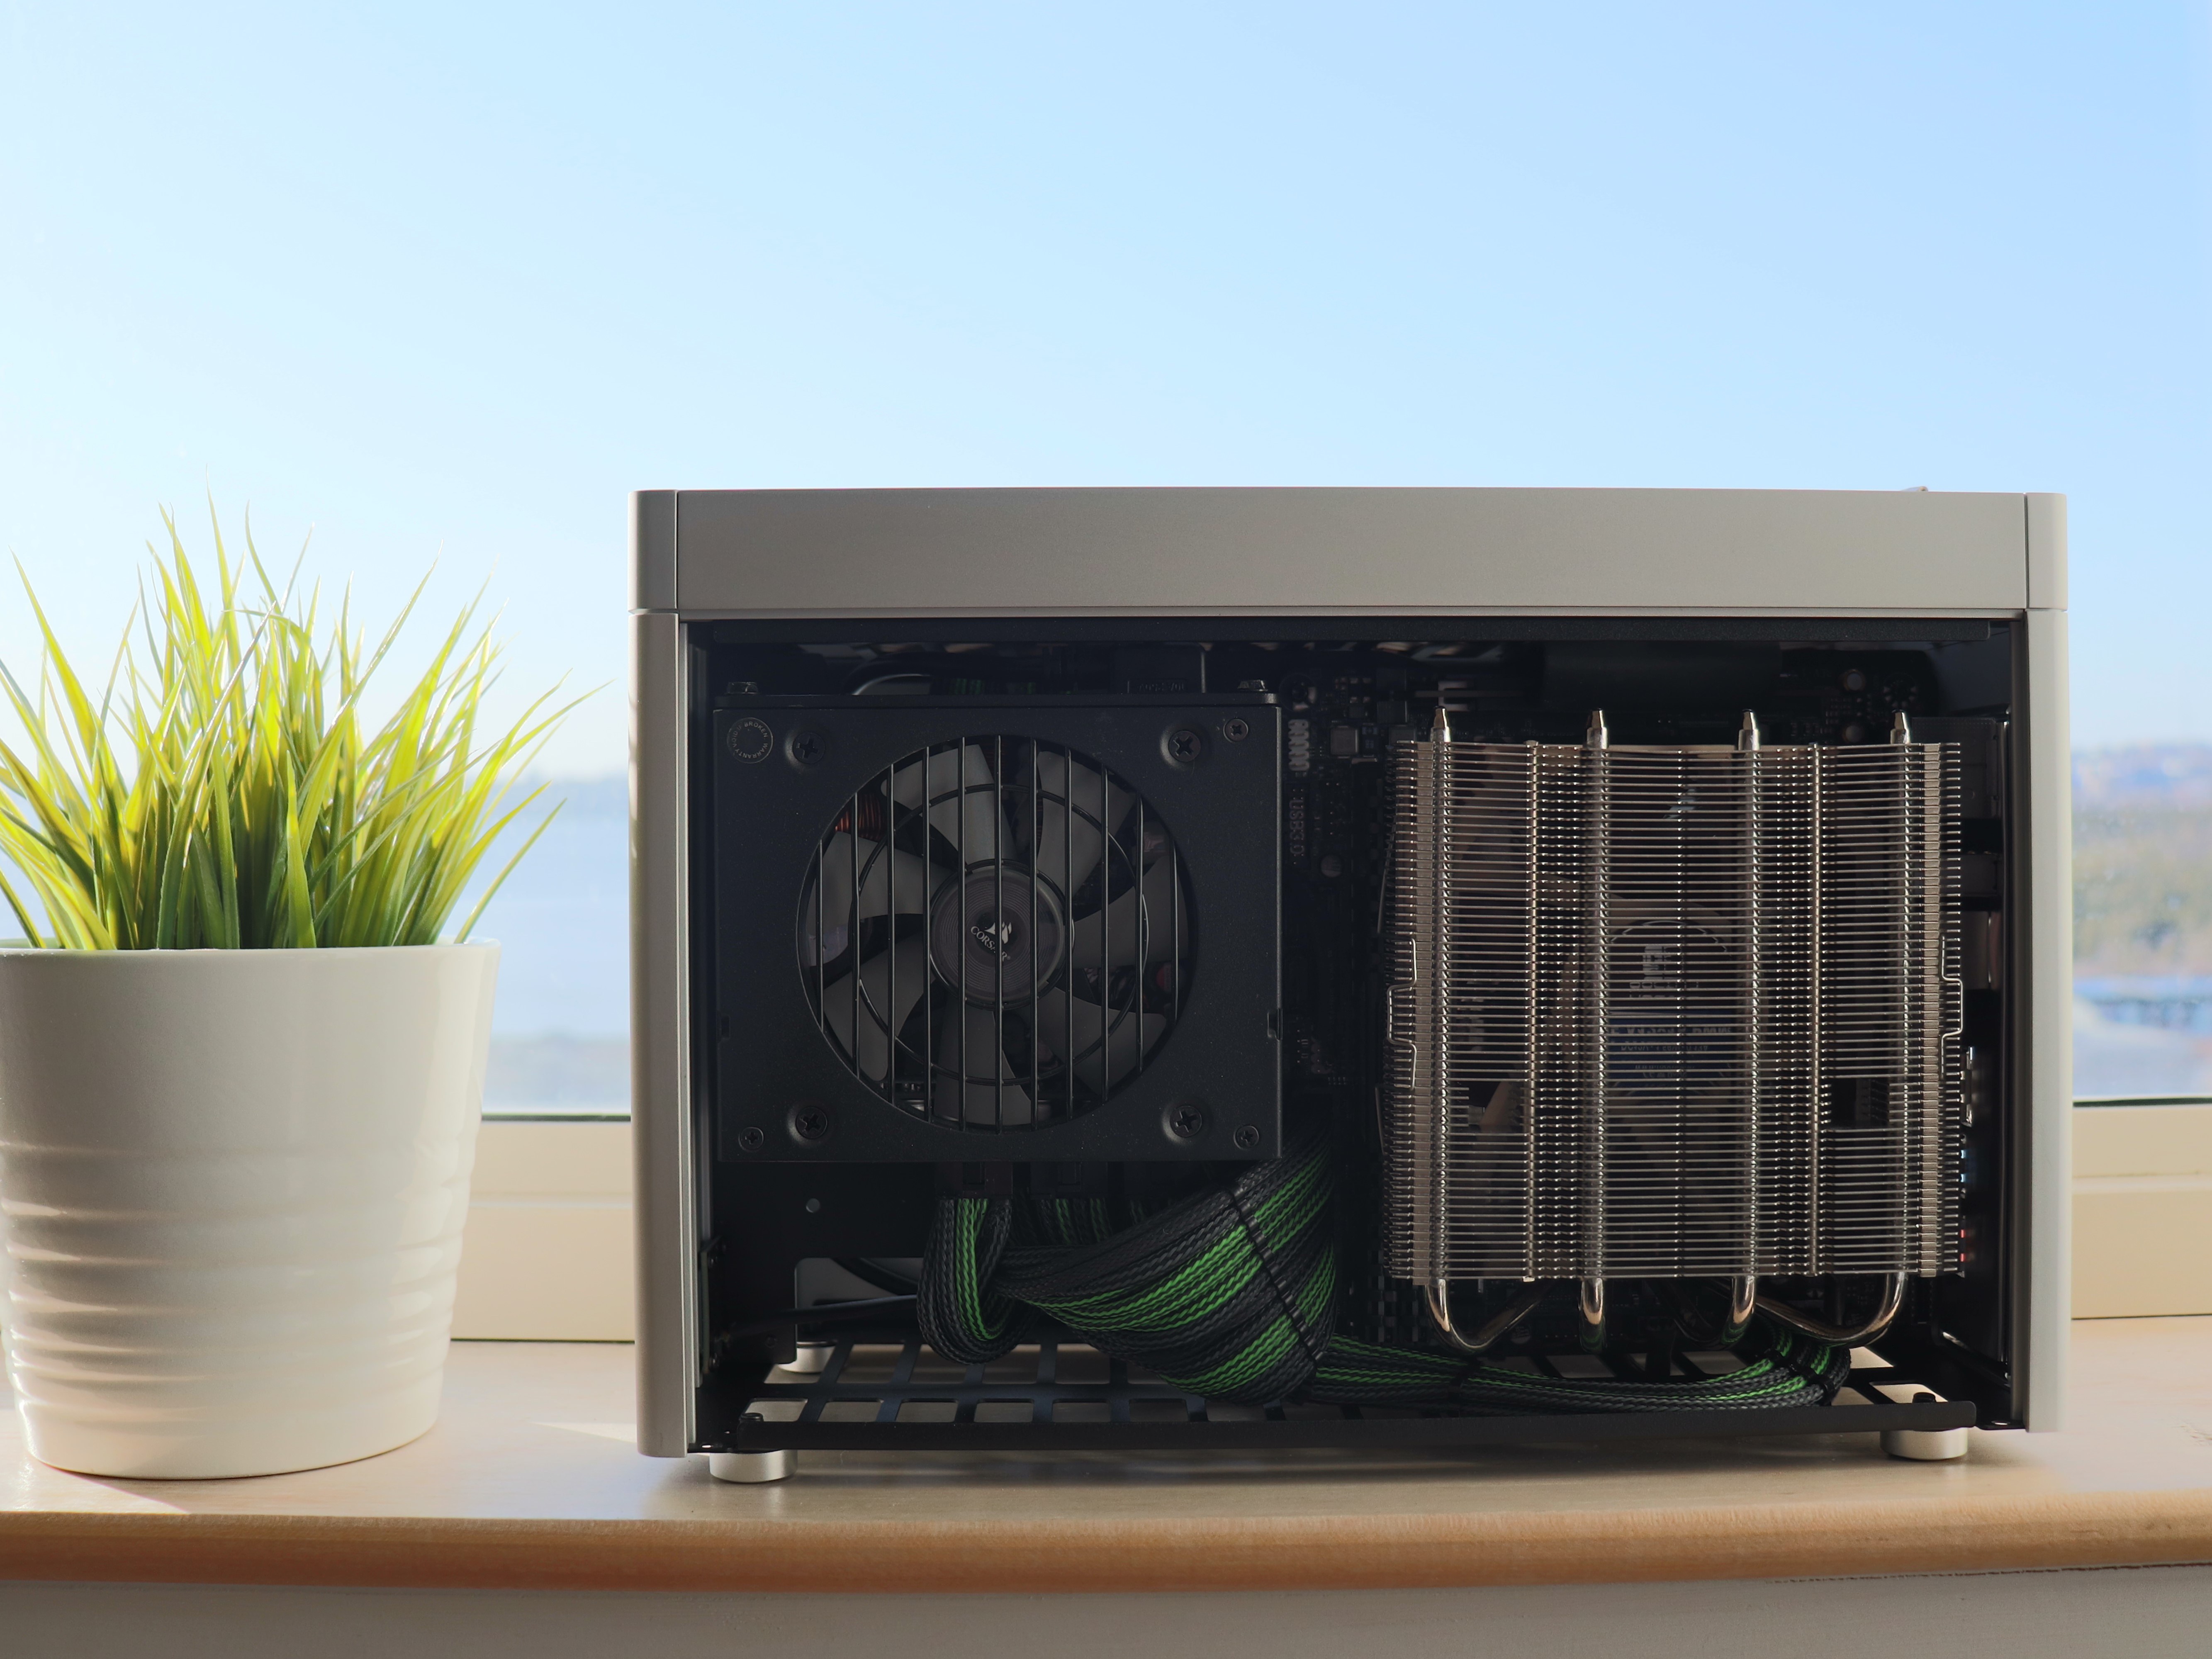
FormD T1
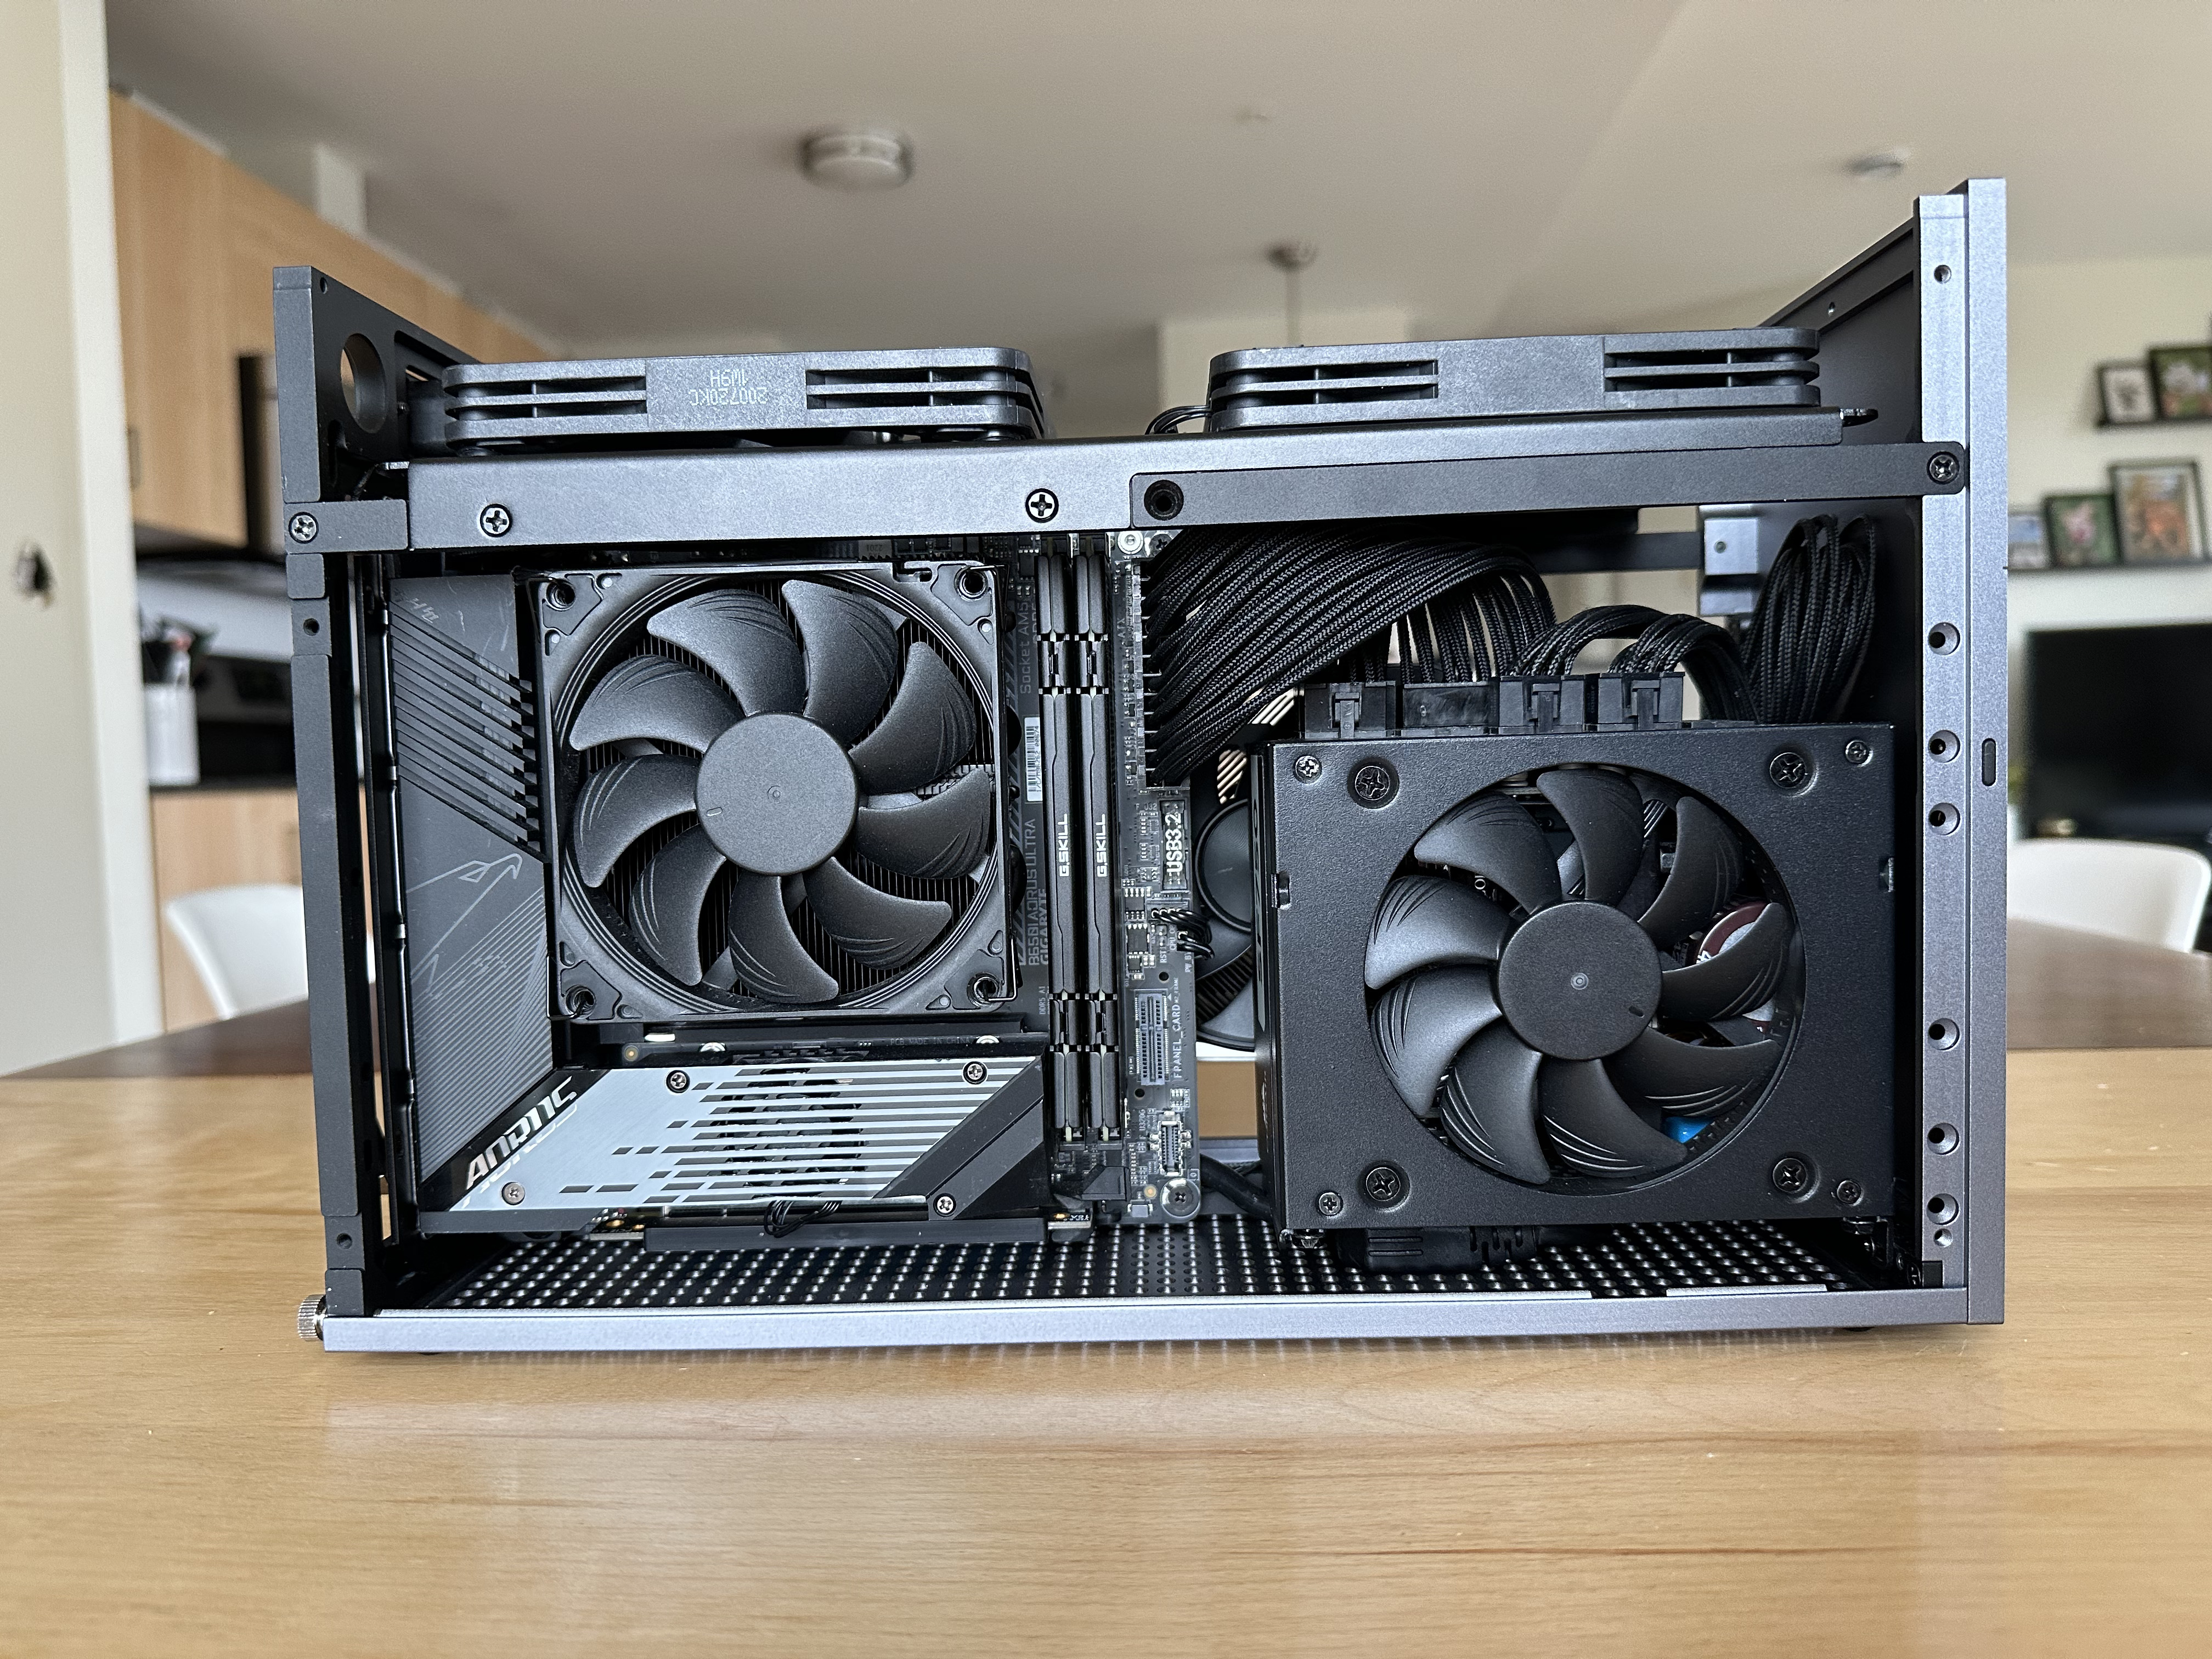
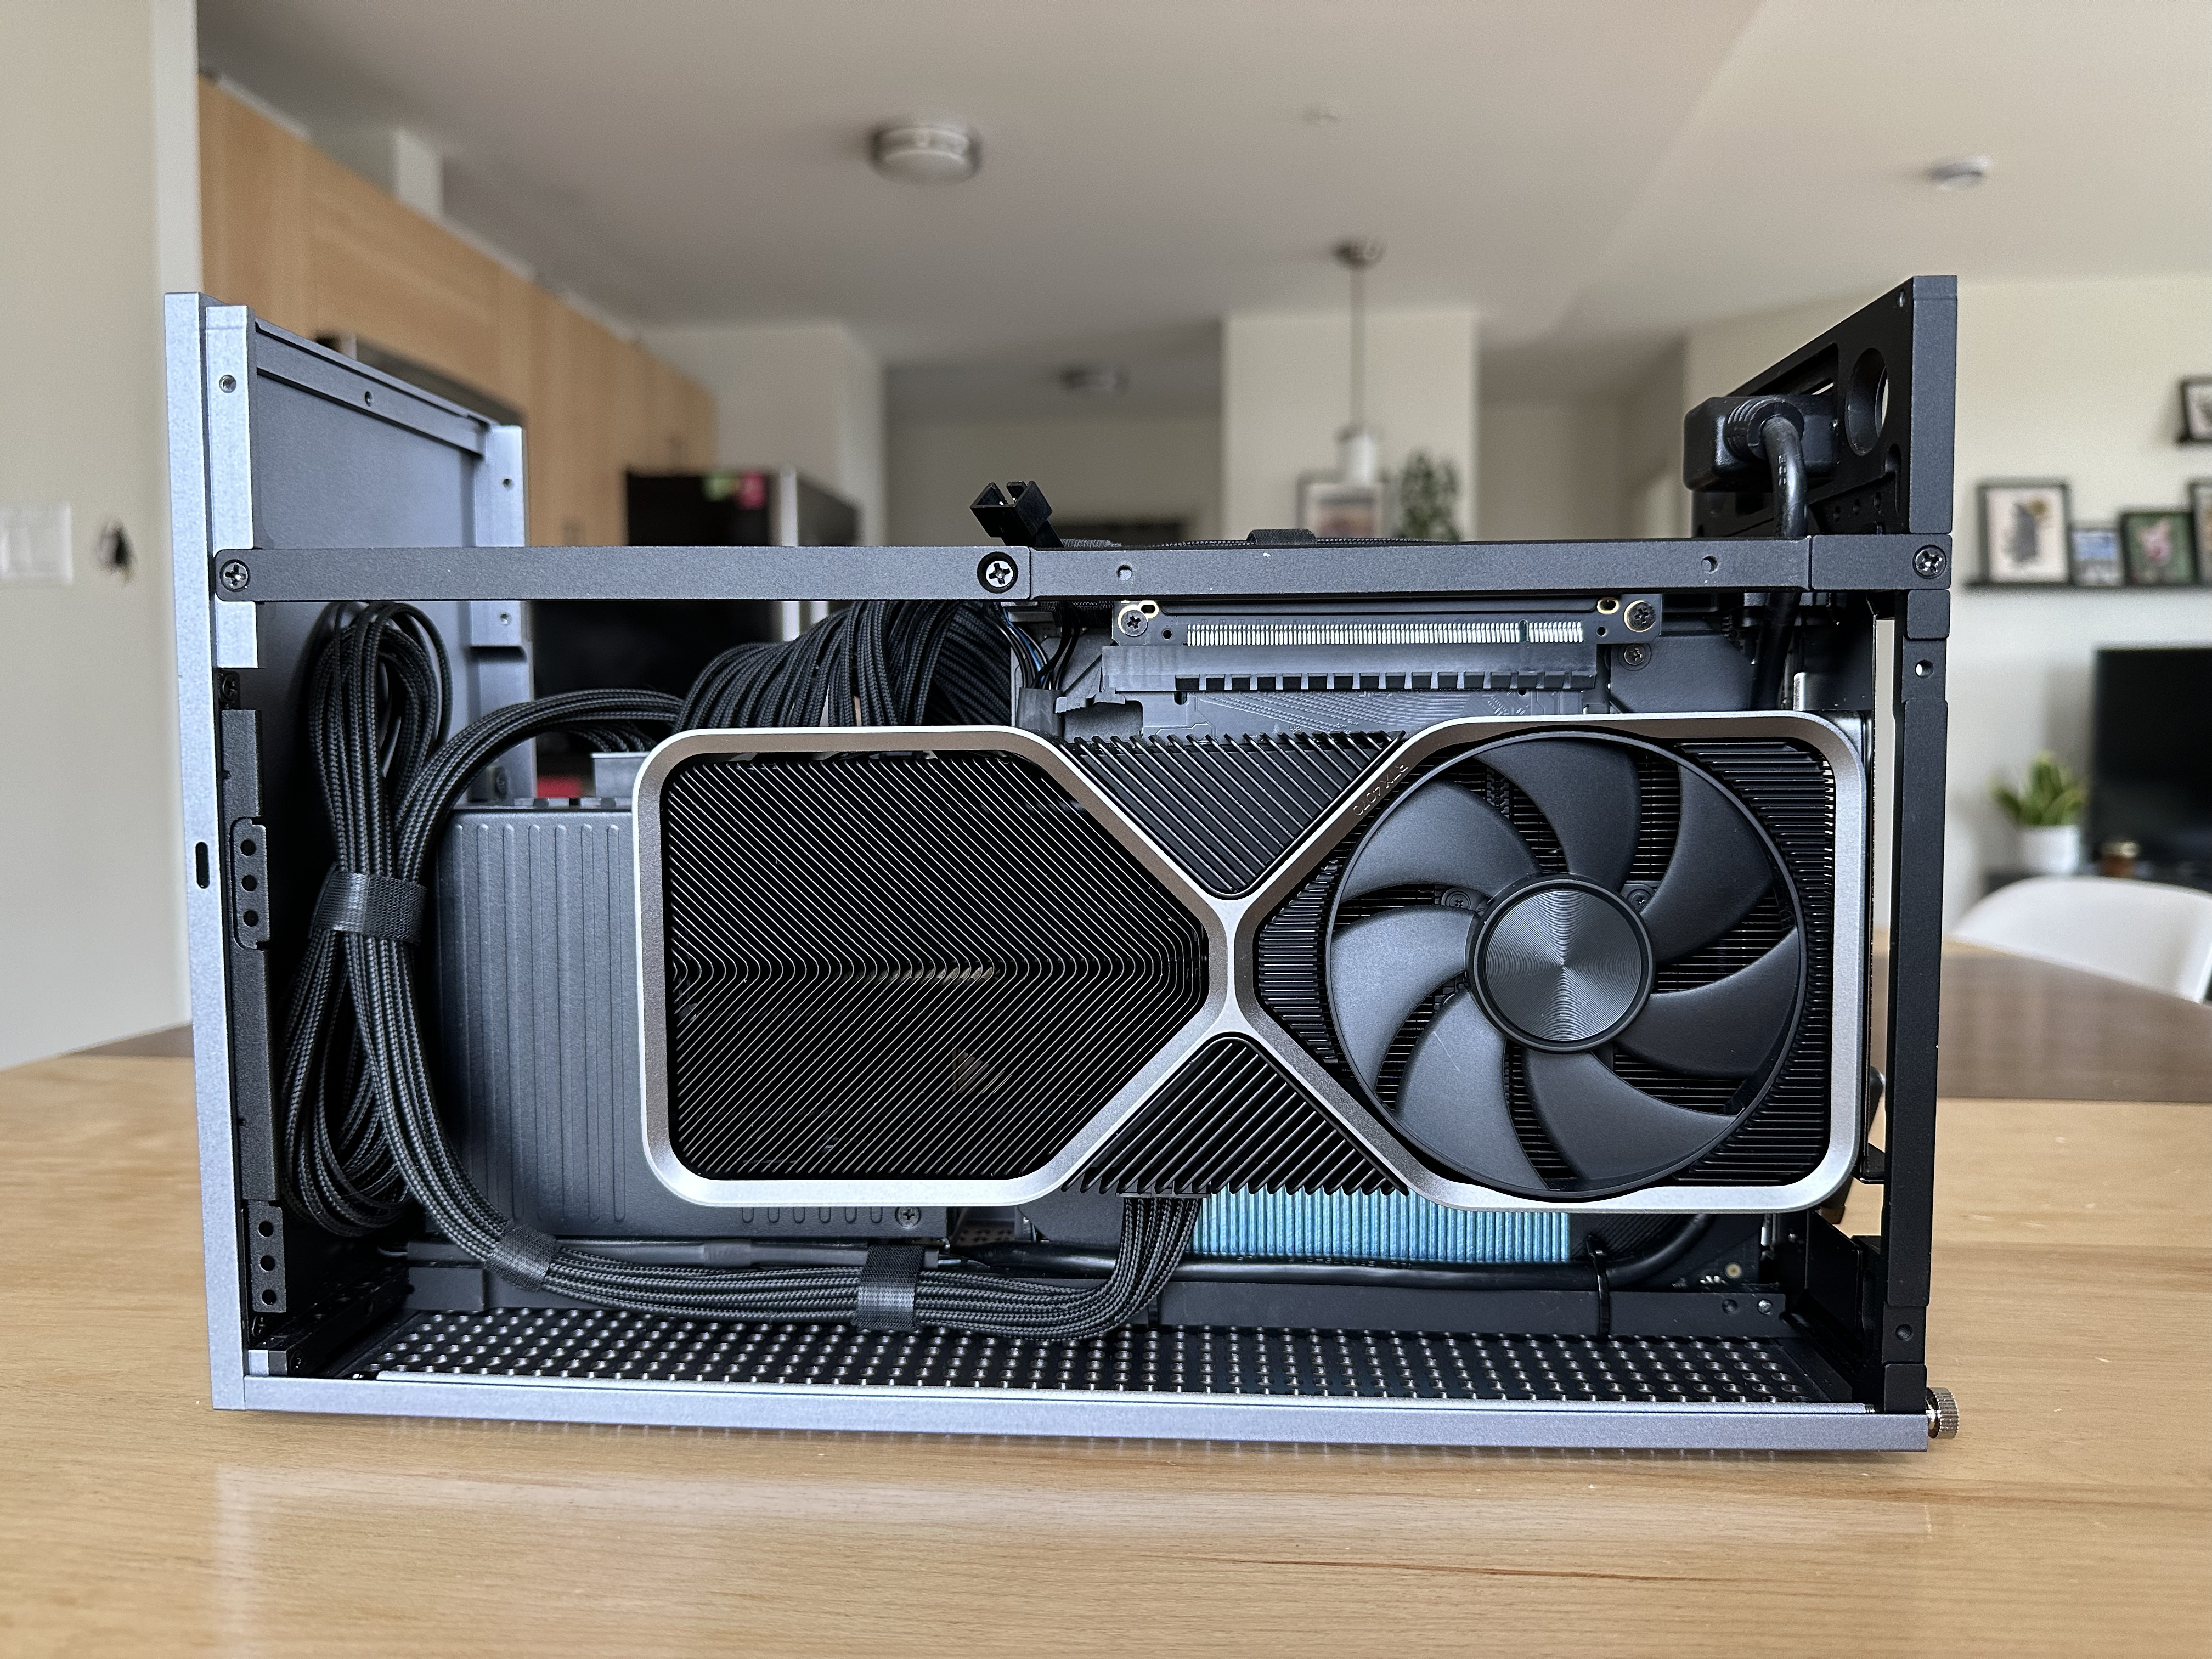

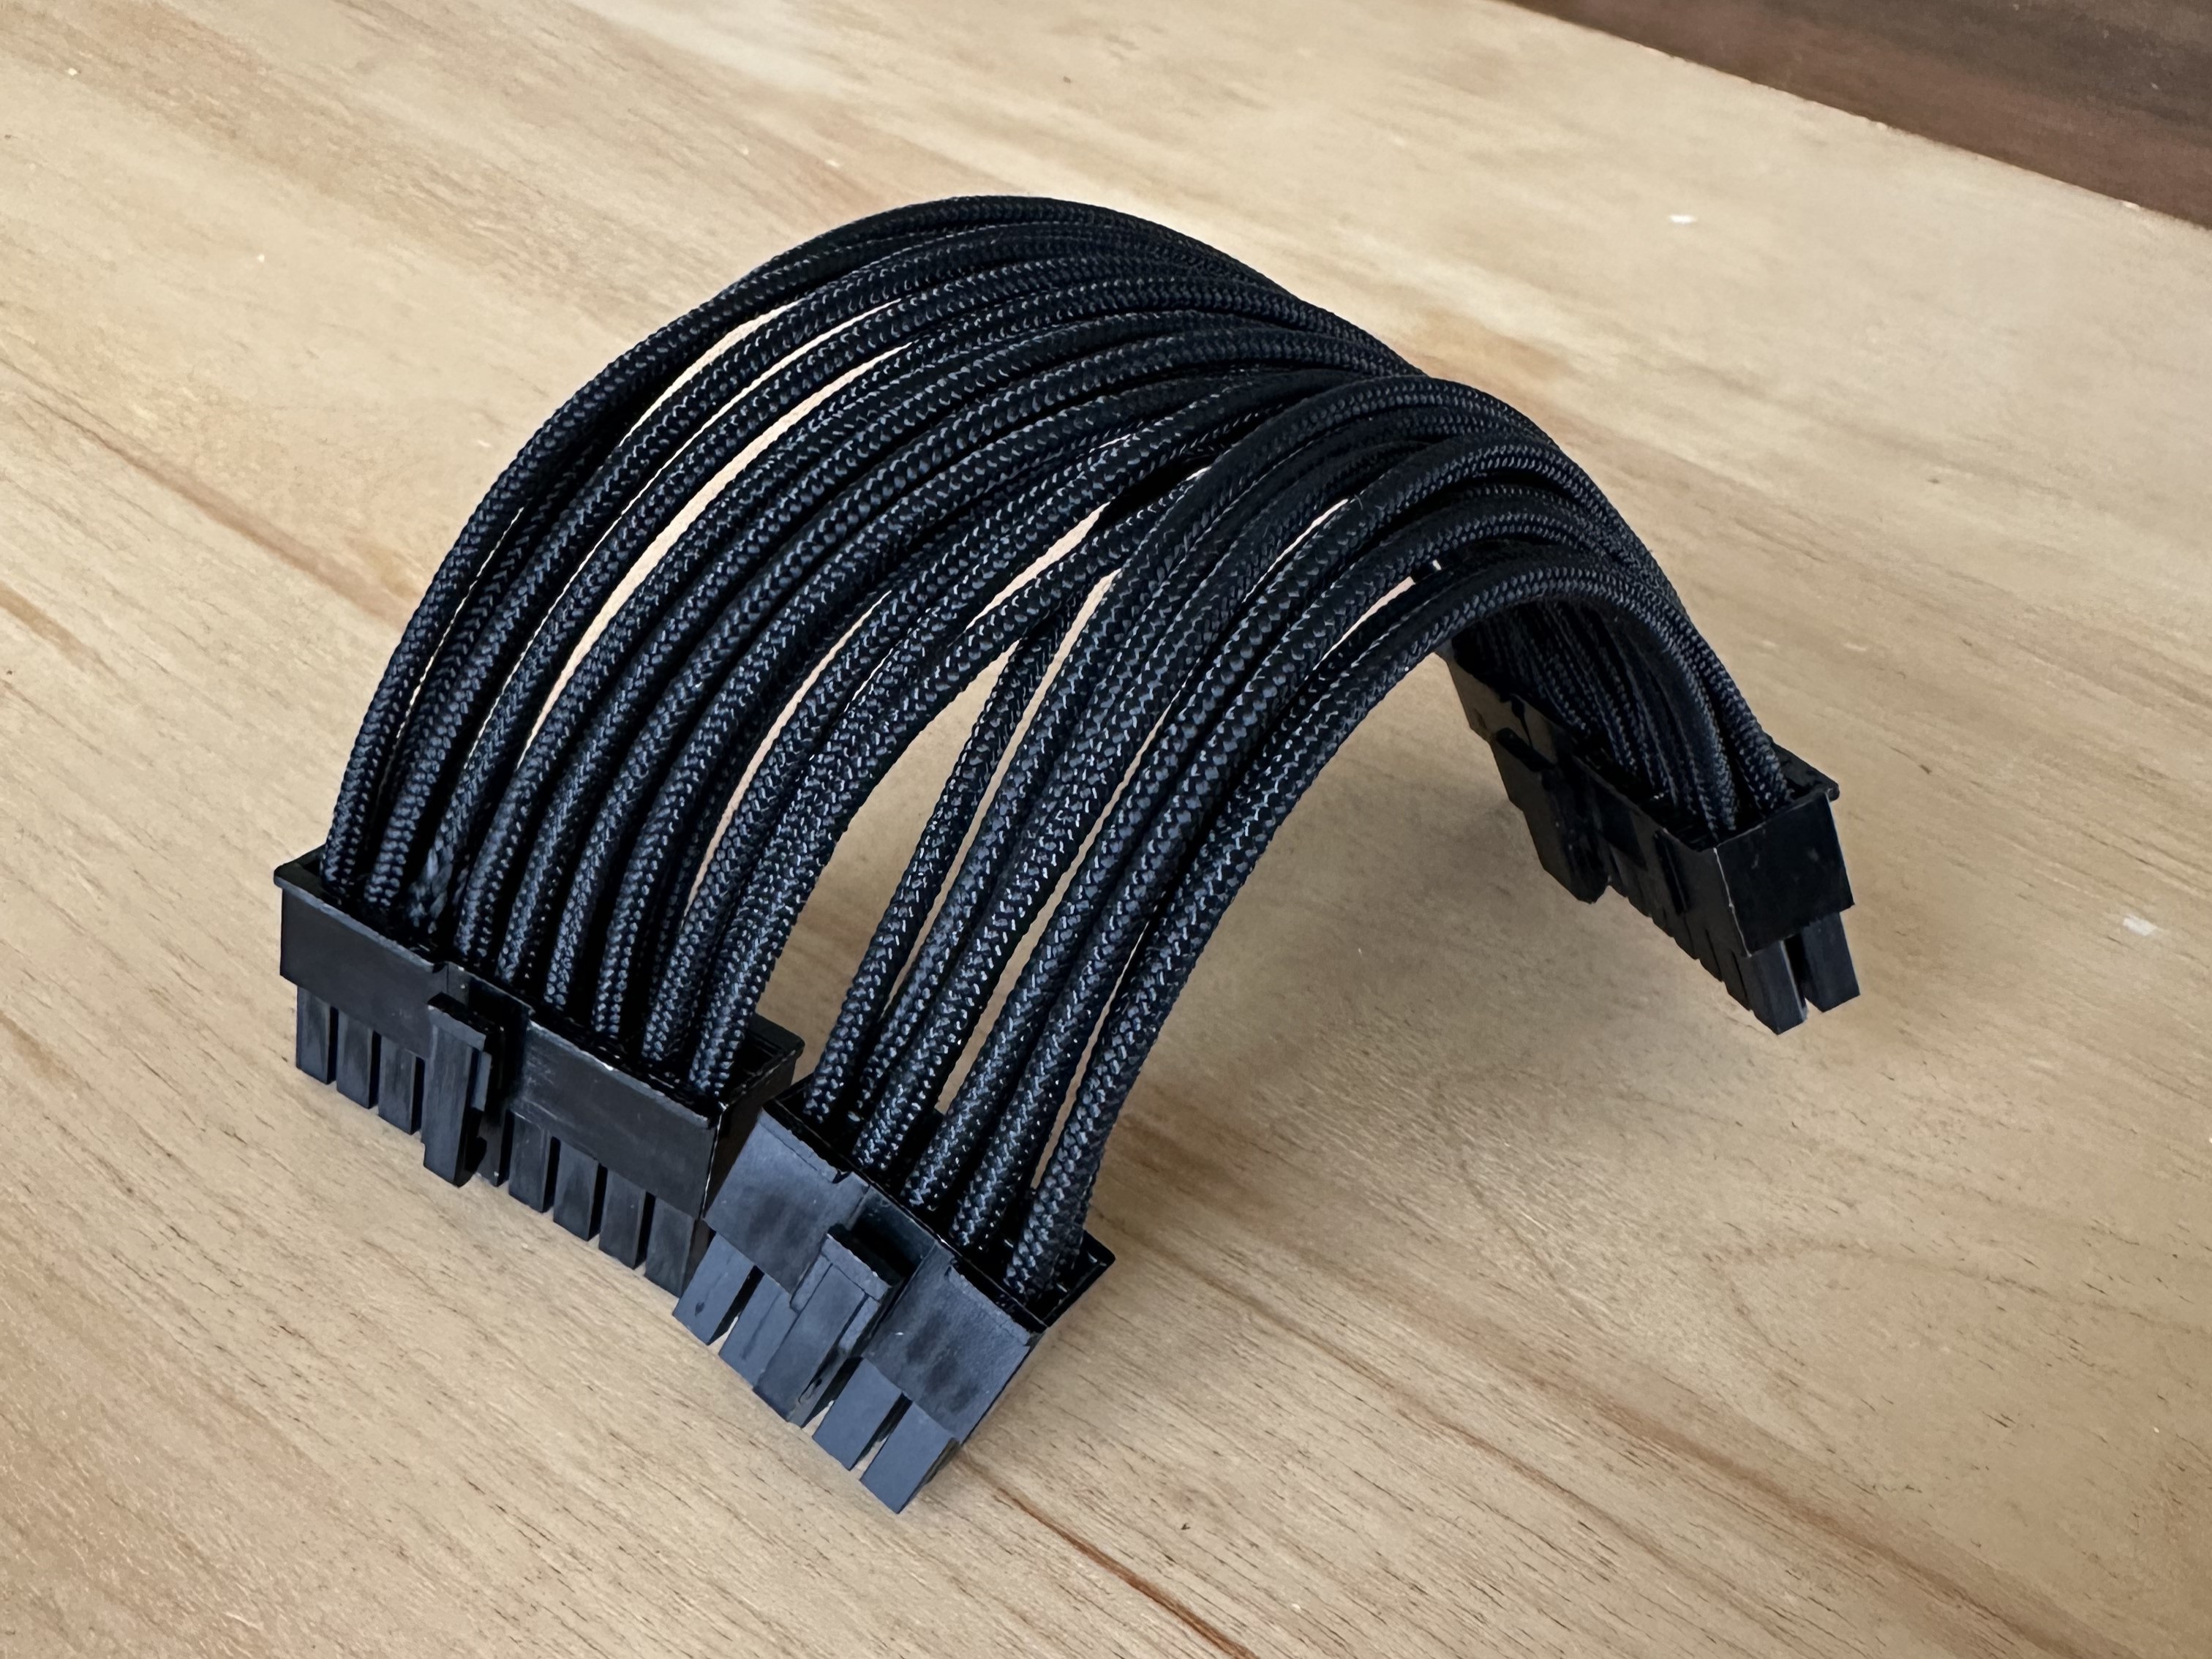
My T1 is the latest chapter. Everything I learned up until this point went into this build in one way or another. I decided to step back from water cooling go with a much simpler build this time around but it didn’t come without compromise. The AXP90-X53 is just enough to handle 7600X under full load with an undervolt. I made a another custom set of cables for the motherboard power and data so the internals would be nicely organized. I thought to do the same for the GPU cable but Nvidia introduced the 12VHPWR connector for the 4000 series cards to deliver more power. That connector had a history of overheating (and even starting a few fires) so I decided to leave it alone and buy one off the shelf from Corsair. I also decided to ditch the fan grate on the SF750 and replace the stock fan with a spare Noctua 92mm chromax that was collecting dust in my parts drawer. That mod required a little bit of trimming and re-soldering of the cables but made the build look much cleaner.
The T1 is one of my all time favorite cases. It’s built really well with high quality materials and has a great anodized finish. You have a lot of freedom to configure this case how you like, no matter if you’re using air or water to cool it. I think at some point I’ll switch back to water cooling but until then this build will handle just about anything I can throw at it.
Part List
- Case: FormD T1 v2.1
- CPU: AMD Ryzen 5 7600X
- GPU: Nvidia GeForce RTX 4070 FE
- Motherboard: Gigabyte Aorus B650I Ultra
- Cooler: Thermalright AXP90-X53
- Memory: G.Skill Flare X5 32GB 6000Mhz
- Storage: Corsair Force MP500 960GB M.2 SSD
- Power: Corsair SF750 80 Plus Platinum SFX
- Other: Noctua NF-A12x15 slim fans